

自從脫離 Home Assistant Cloud 服務後,接入 Google Home 也需要自己動手處理了,今天就帶大家一起來完成 Home Assistant 接入 Google Home 吧!
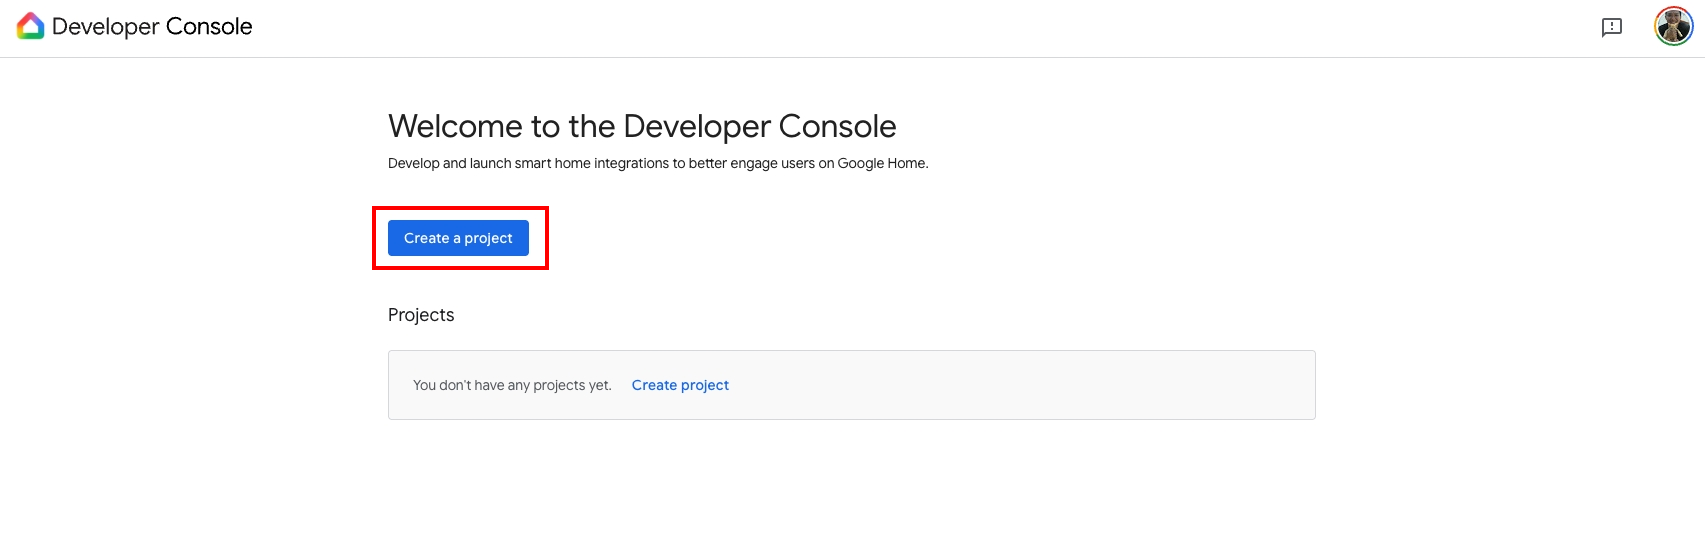
Step 1. 登入 Google Home Developer Console 並建立專案
- 打開 Google Home Developer Console
- 「Create a project」
- 「Create project」
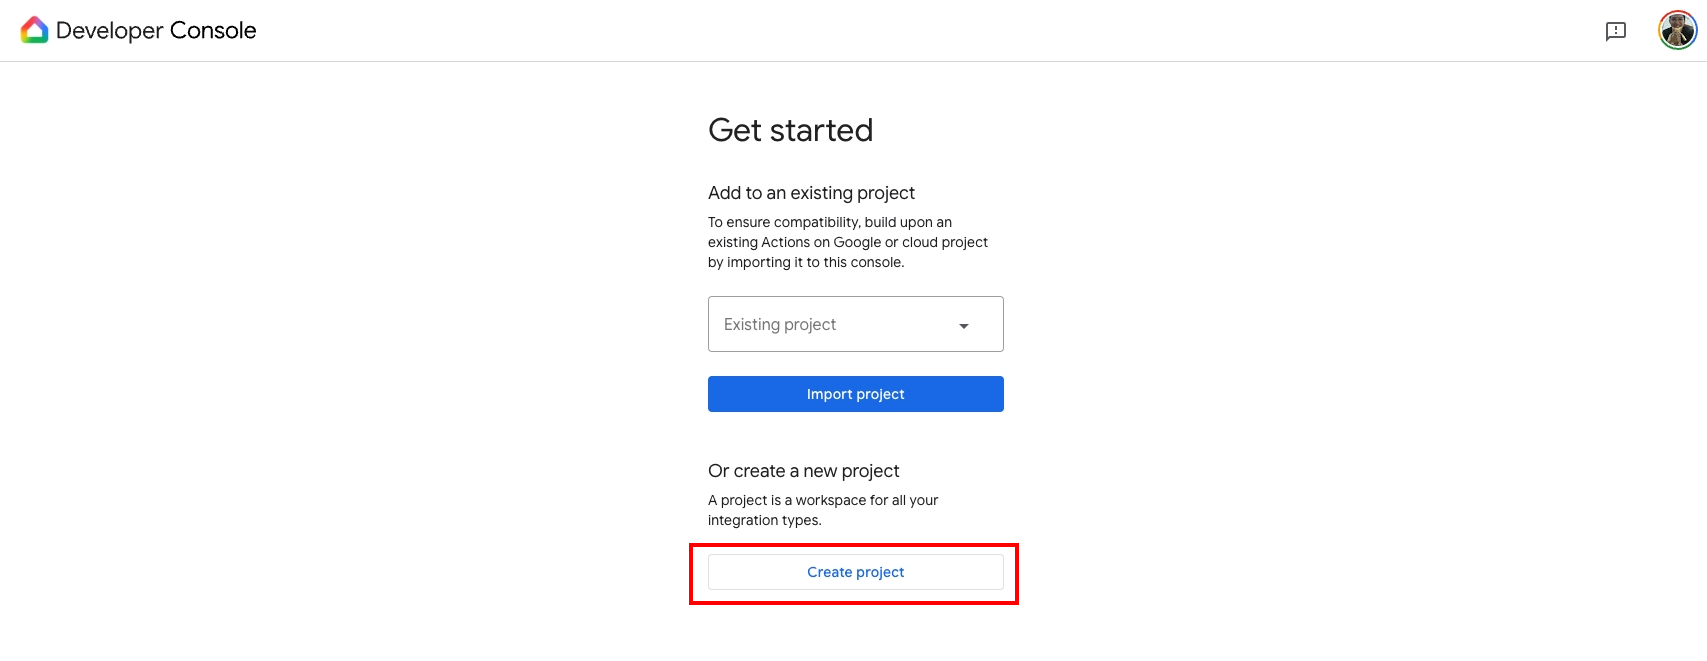
- 設定名稱後點擊「Create project」

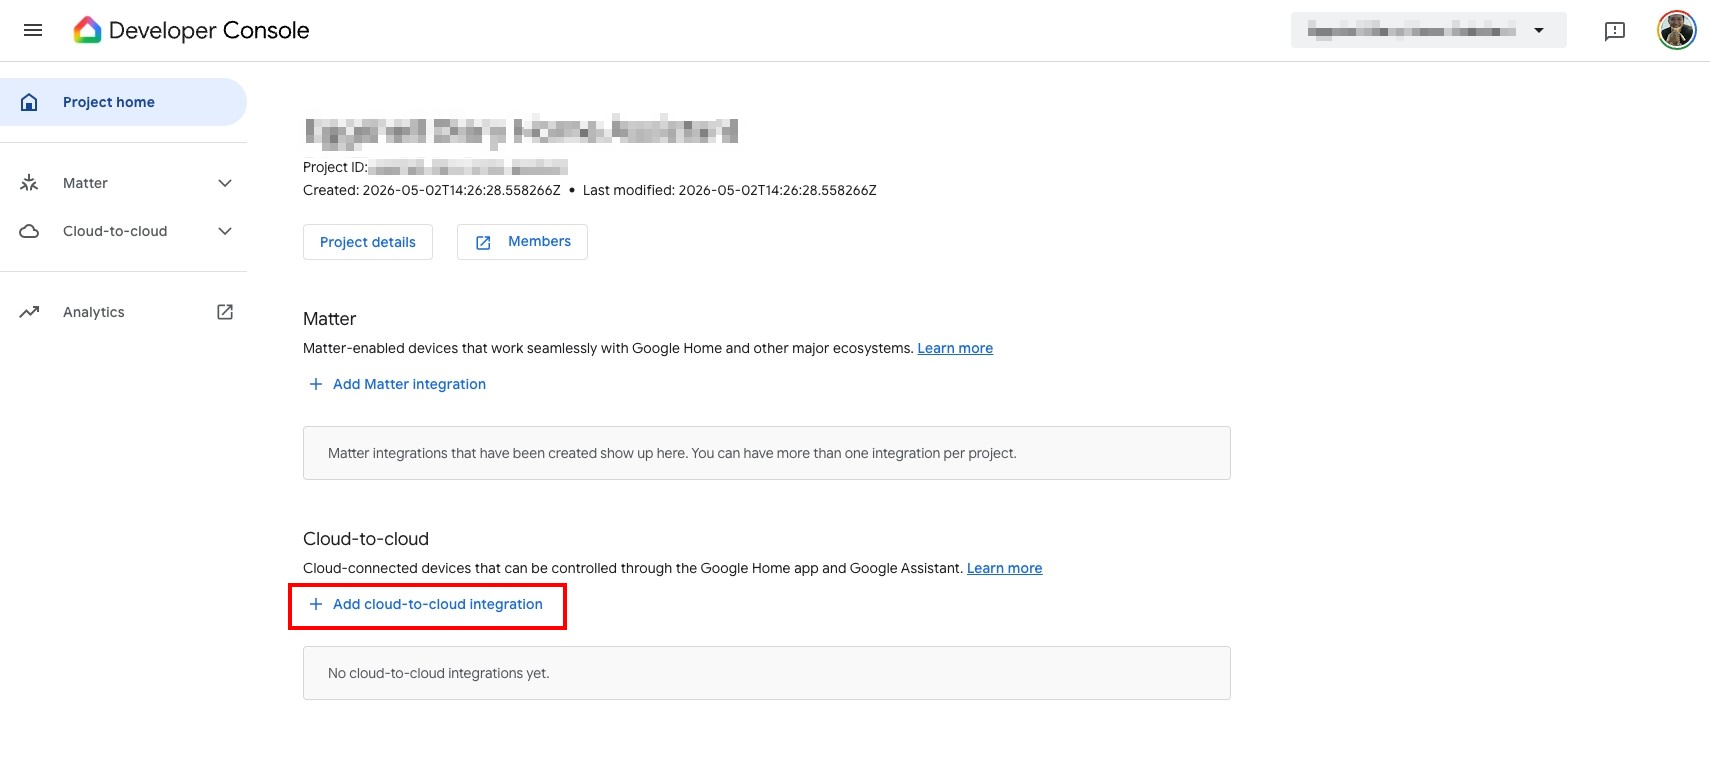
Step 2. 設定 Cloud-to-cloud integration
- 點擊「Add cloud-to-cloud integration」
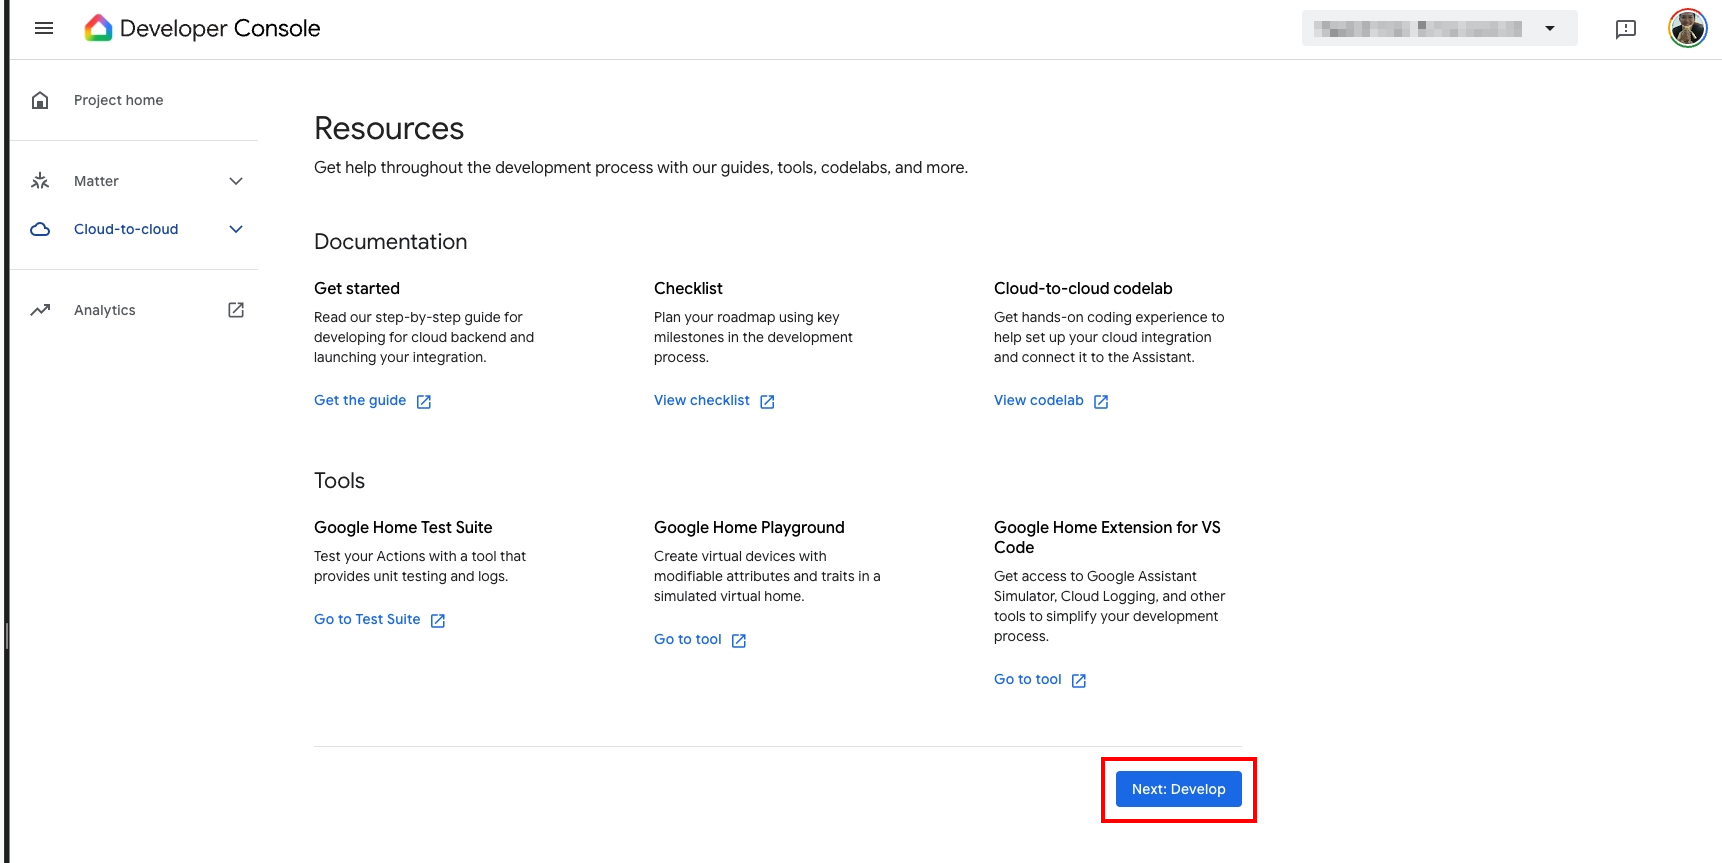
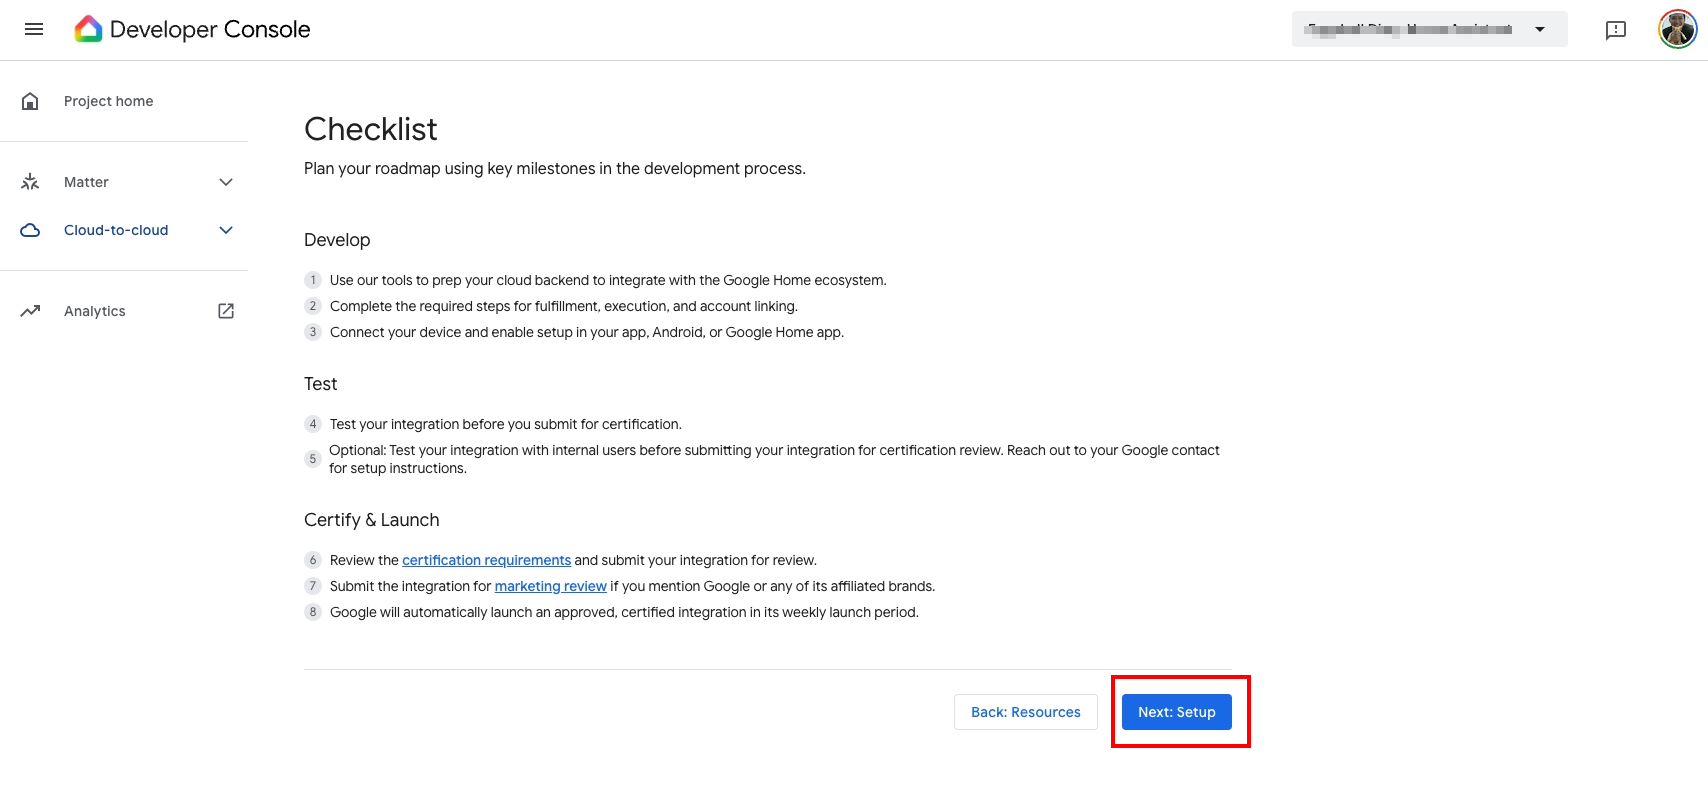
- 點擊「Next: Develop」
- 點擊「Next: Setup」
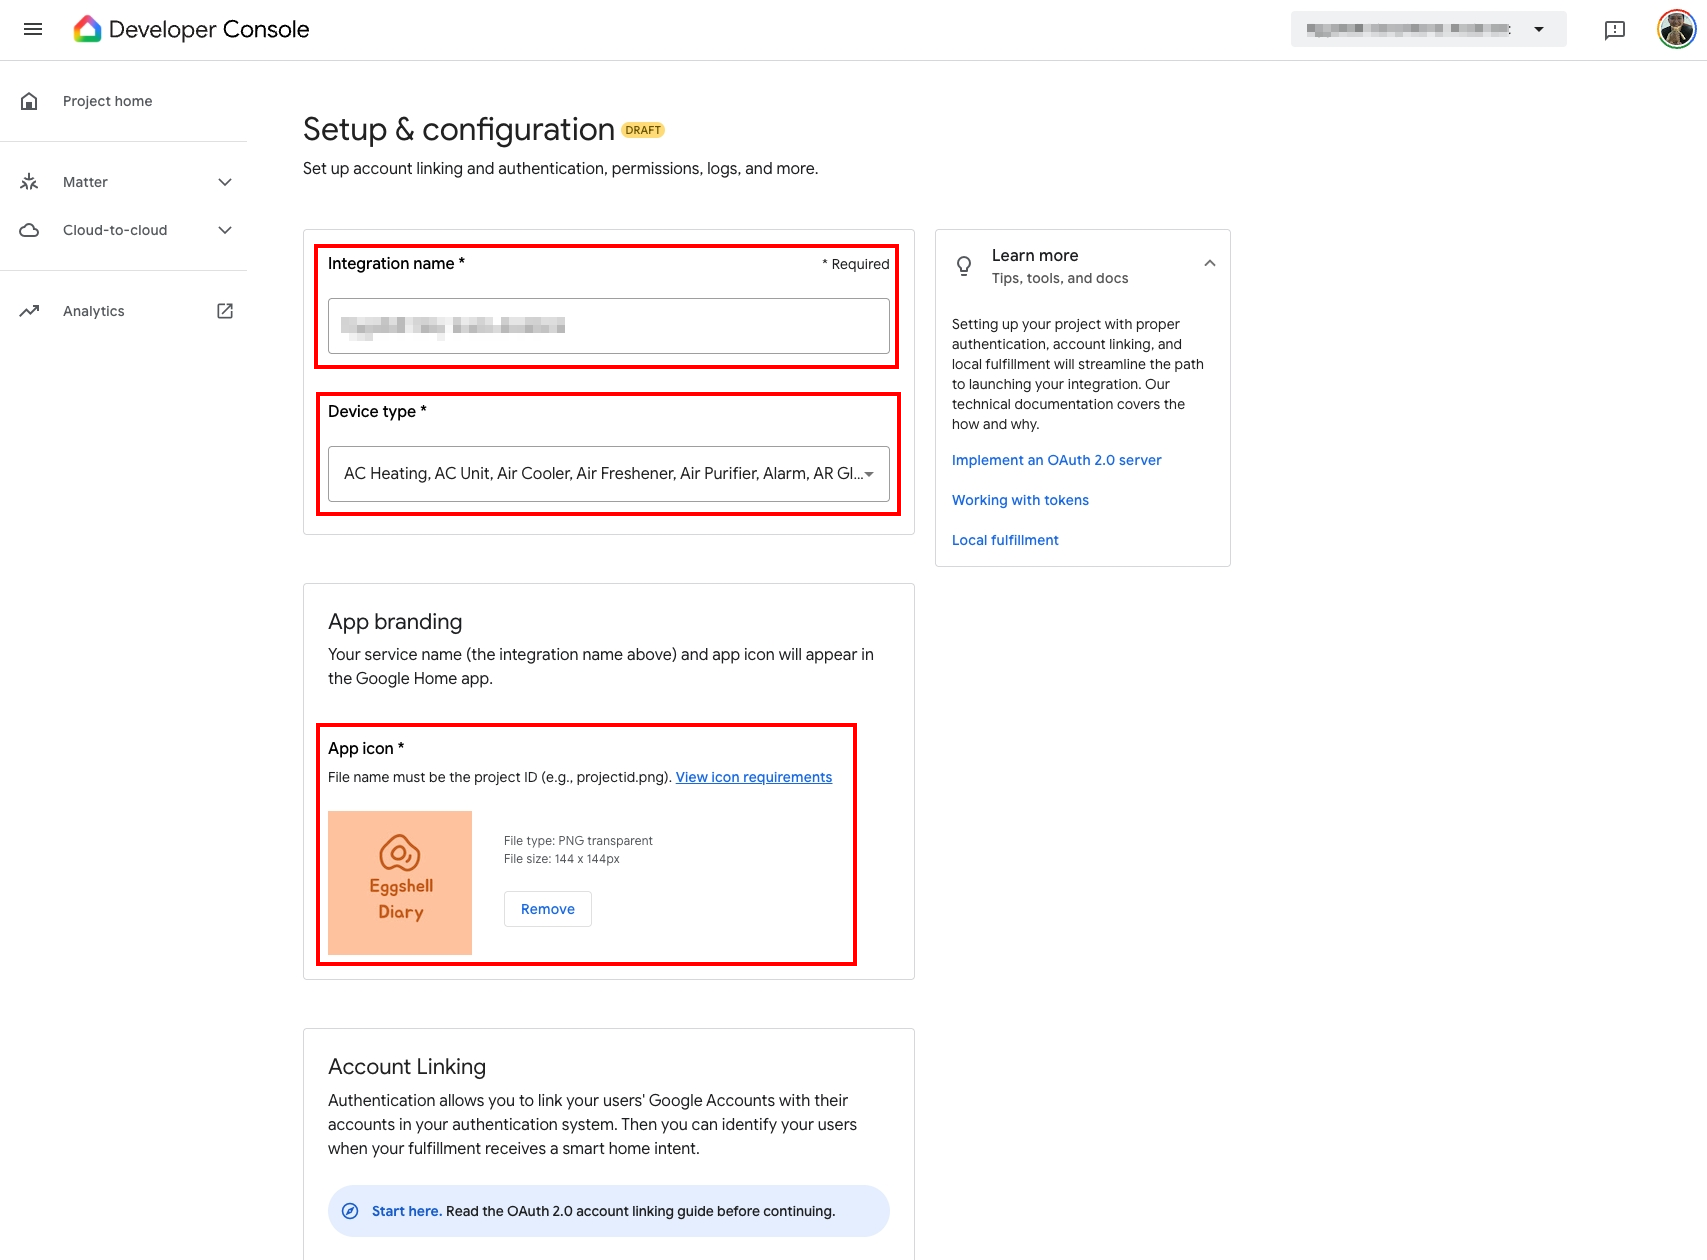
- 輸入 Integration name
- 選擇 Device type:這裡把全部都選起來 (tips: 用 ↓搭配空白鍵選比較快)
- App Icon:給一張 144x144 的 png 圖
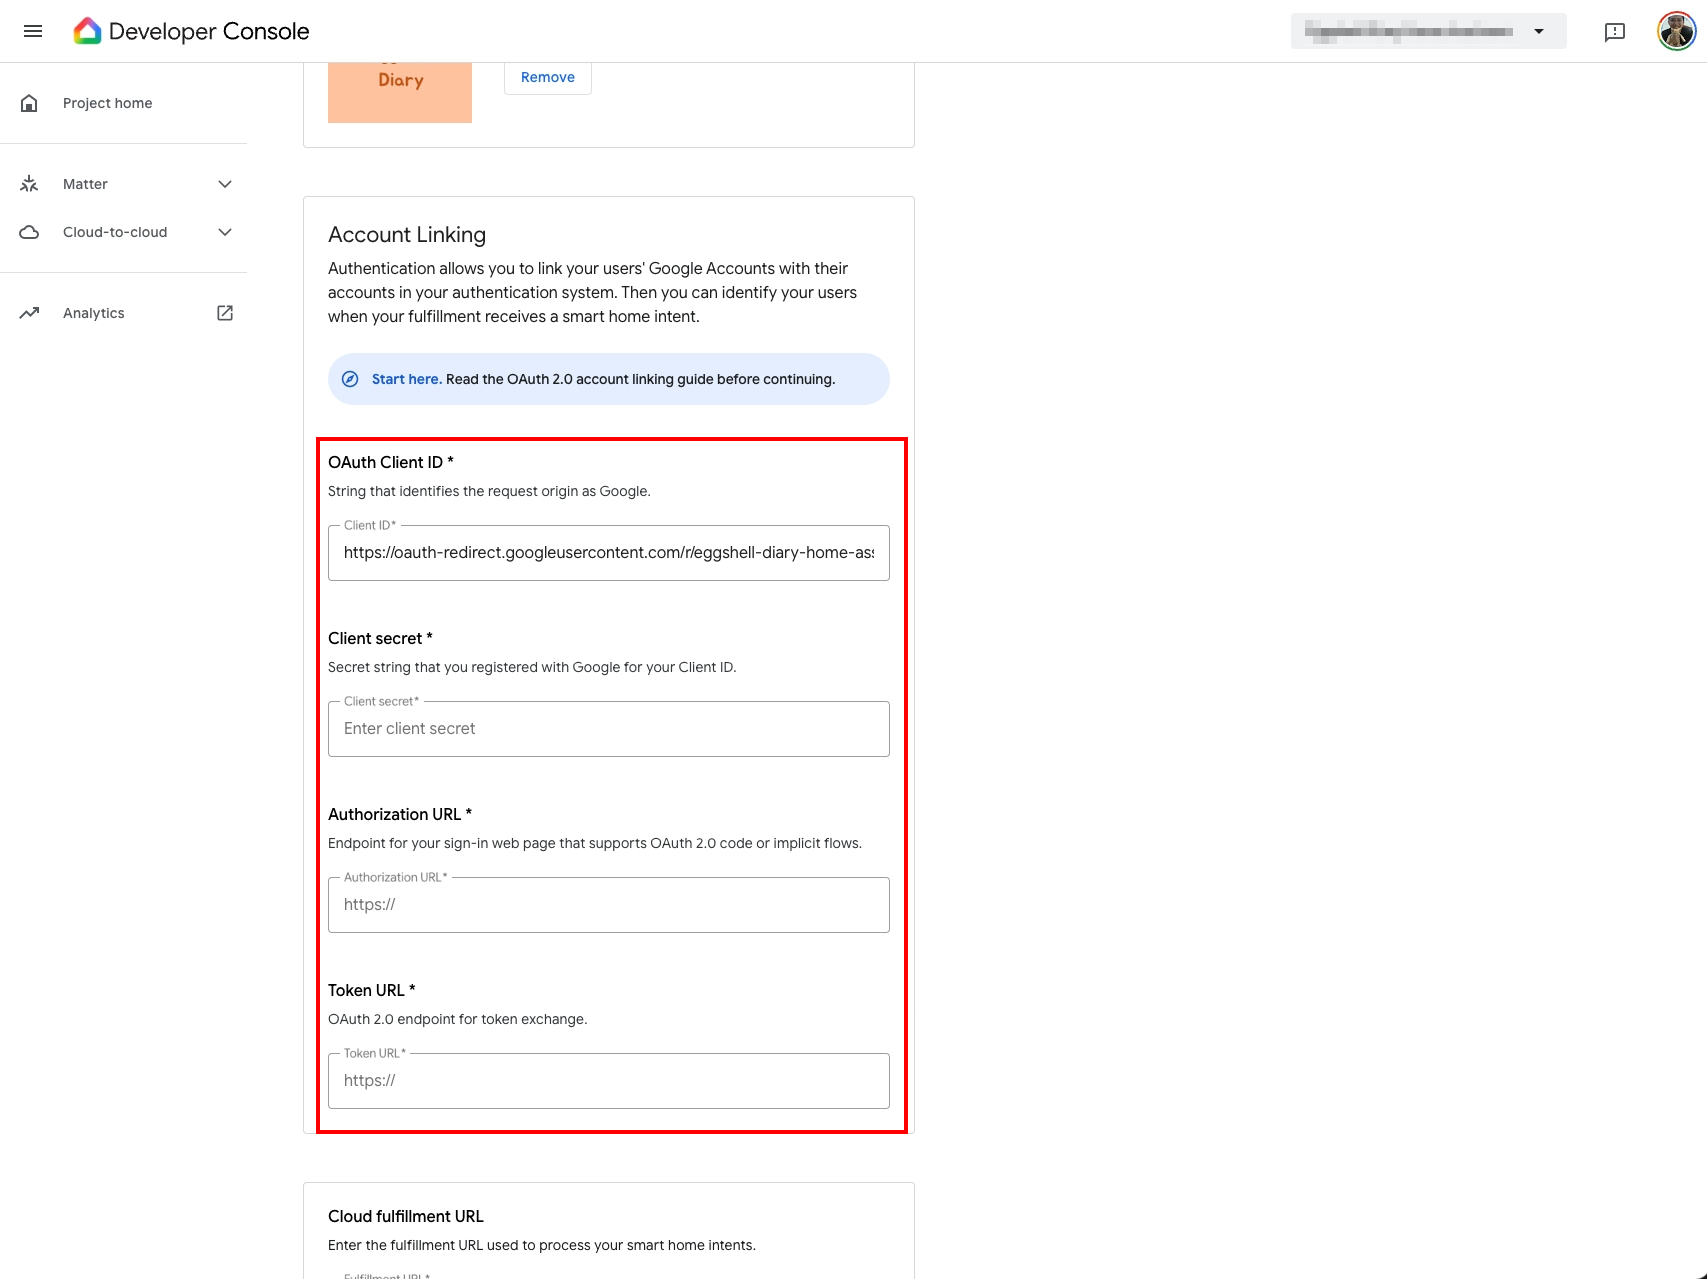
- OAuth Client ID:https://oauth-redirect.googleusercontent.com/r/[YOUR_PROJECT_ID],把 [YOUR_PROJECT_ID] 替換成你建立的 project ID
- Client secret:這裡隨便輸入一些英、數字,實際上不會用到
- Authorization URL:https://[yourdomain:port]/auth/authorize,把 [yourdomain:port] 替換成你的 Home Assistant 對外網址
- Token URL:https://[yourdomain:port]/auth/token,把 [yourdomain:port] 替換成你的 Home Assistant 對外網址
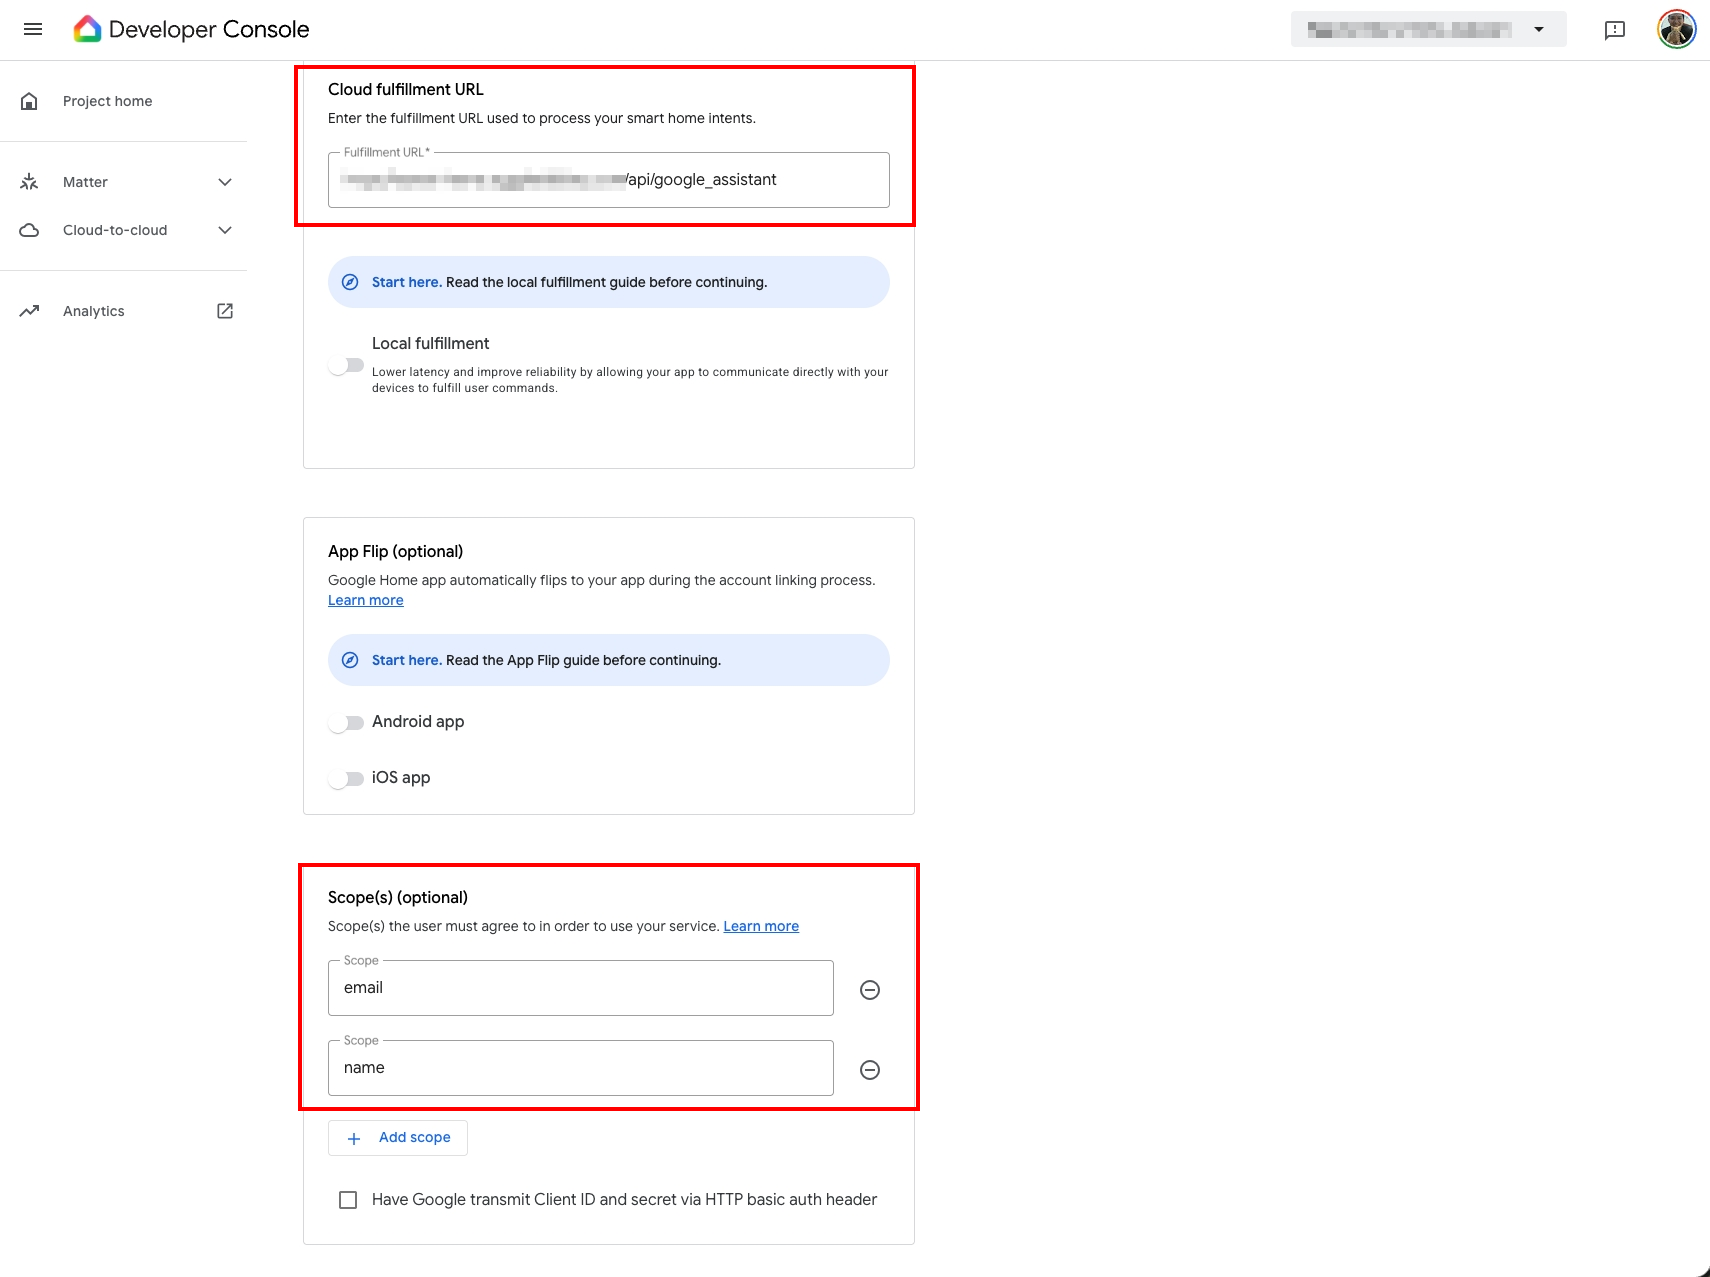
- Cloud fulfillment URL:https://[yourdomain:port]/api/google_assistant,把 [yourdomain:port] 替換成你的 Home Assistant 對外網址
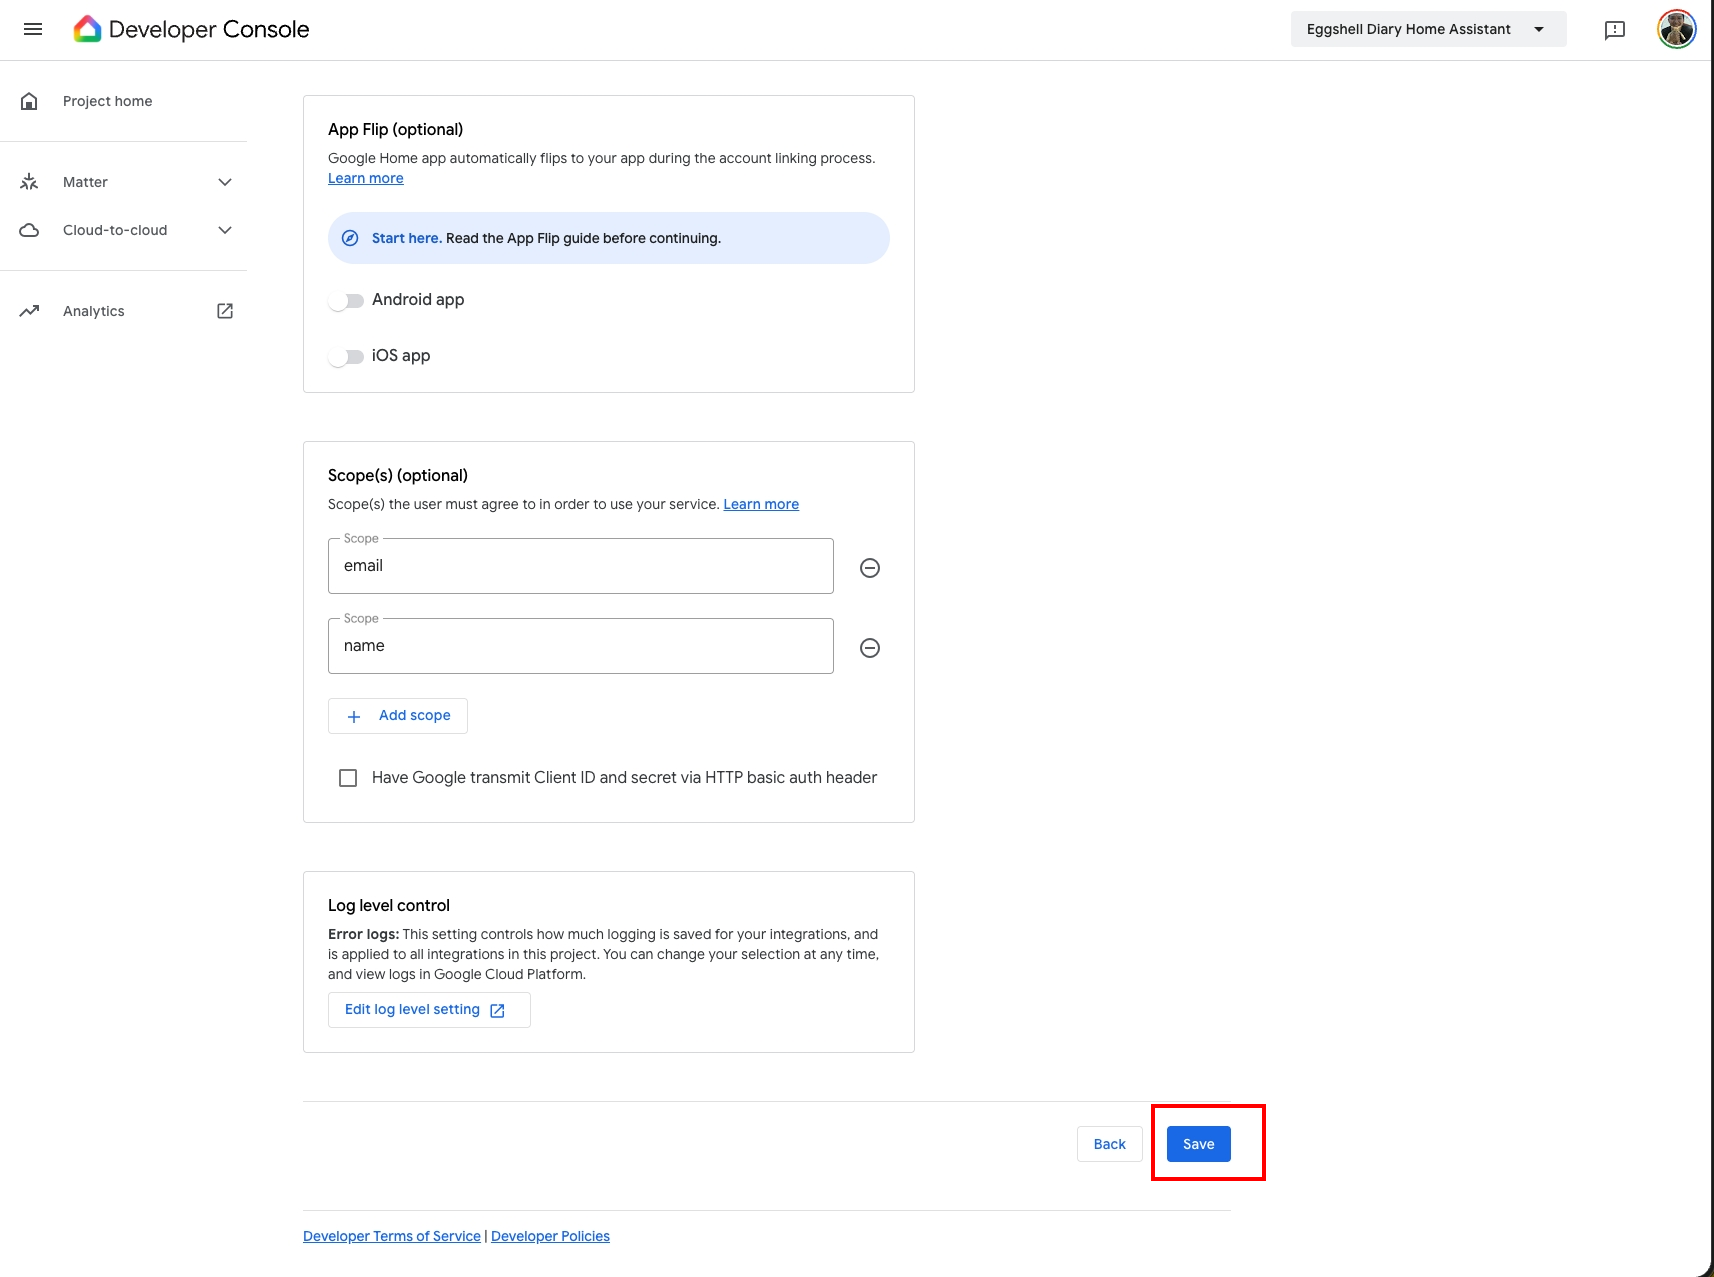
- Scope(s):這裡輸入 email, name
- 「Save」
Step 3. 啟用裝置同步
在 Google Home Developer Console 點擊「Analytics」
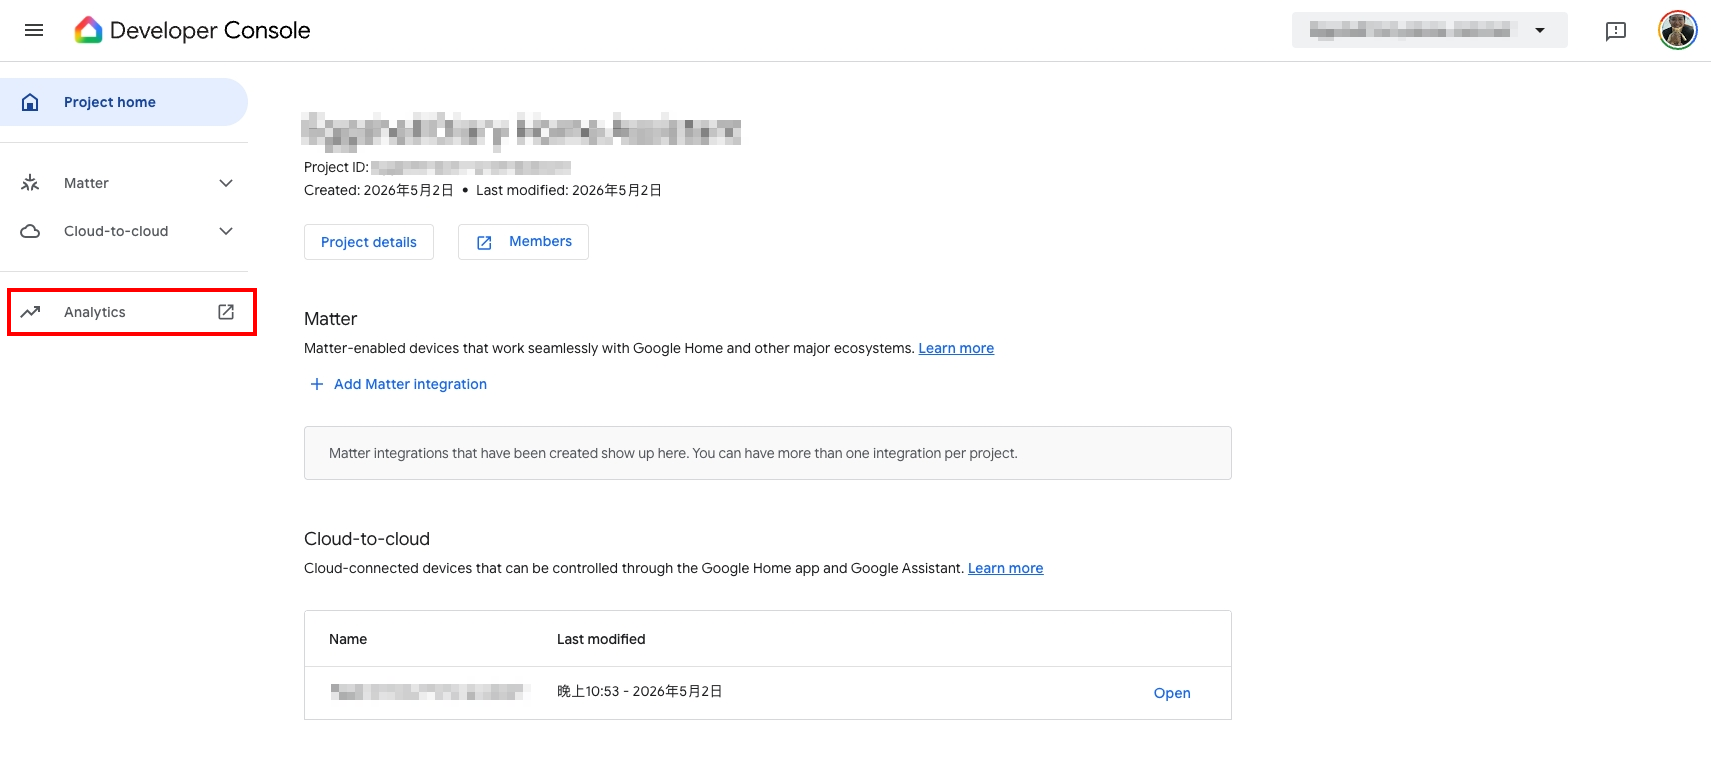
這時候會到 Google Cloud Platform,功能看起來有點多,不要害怕,在側邊選單找到並點擊「API 和服務」。
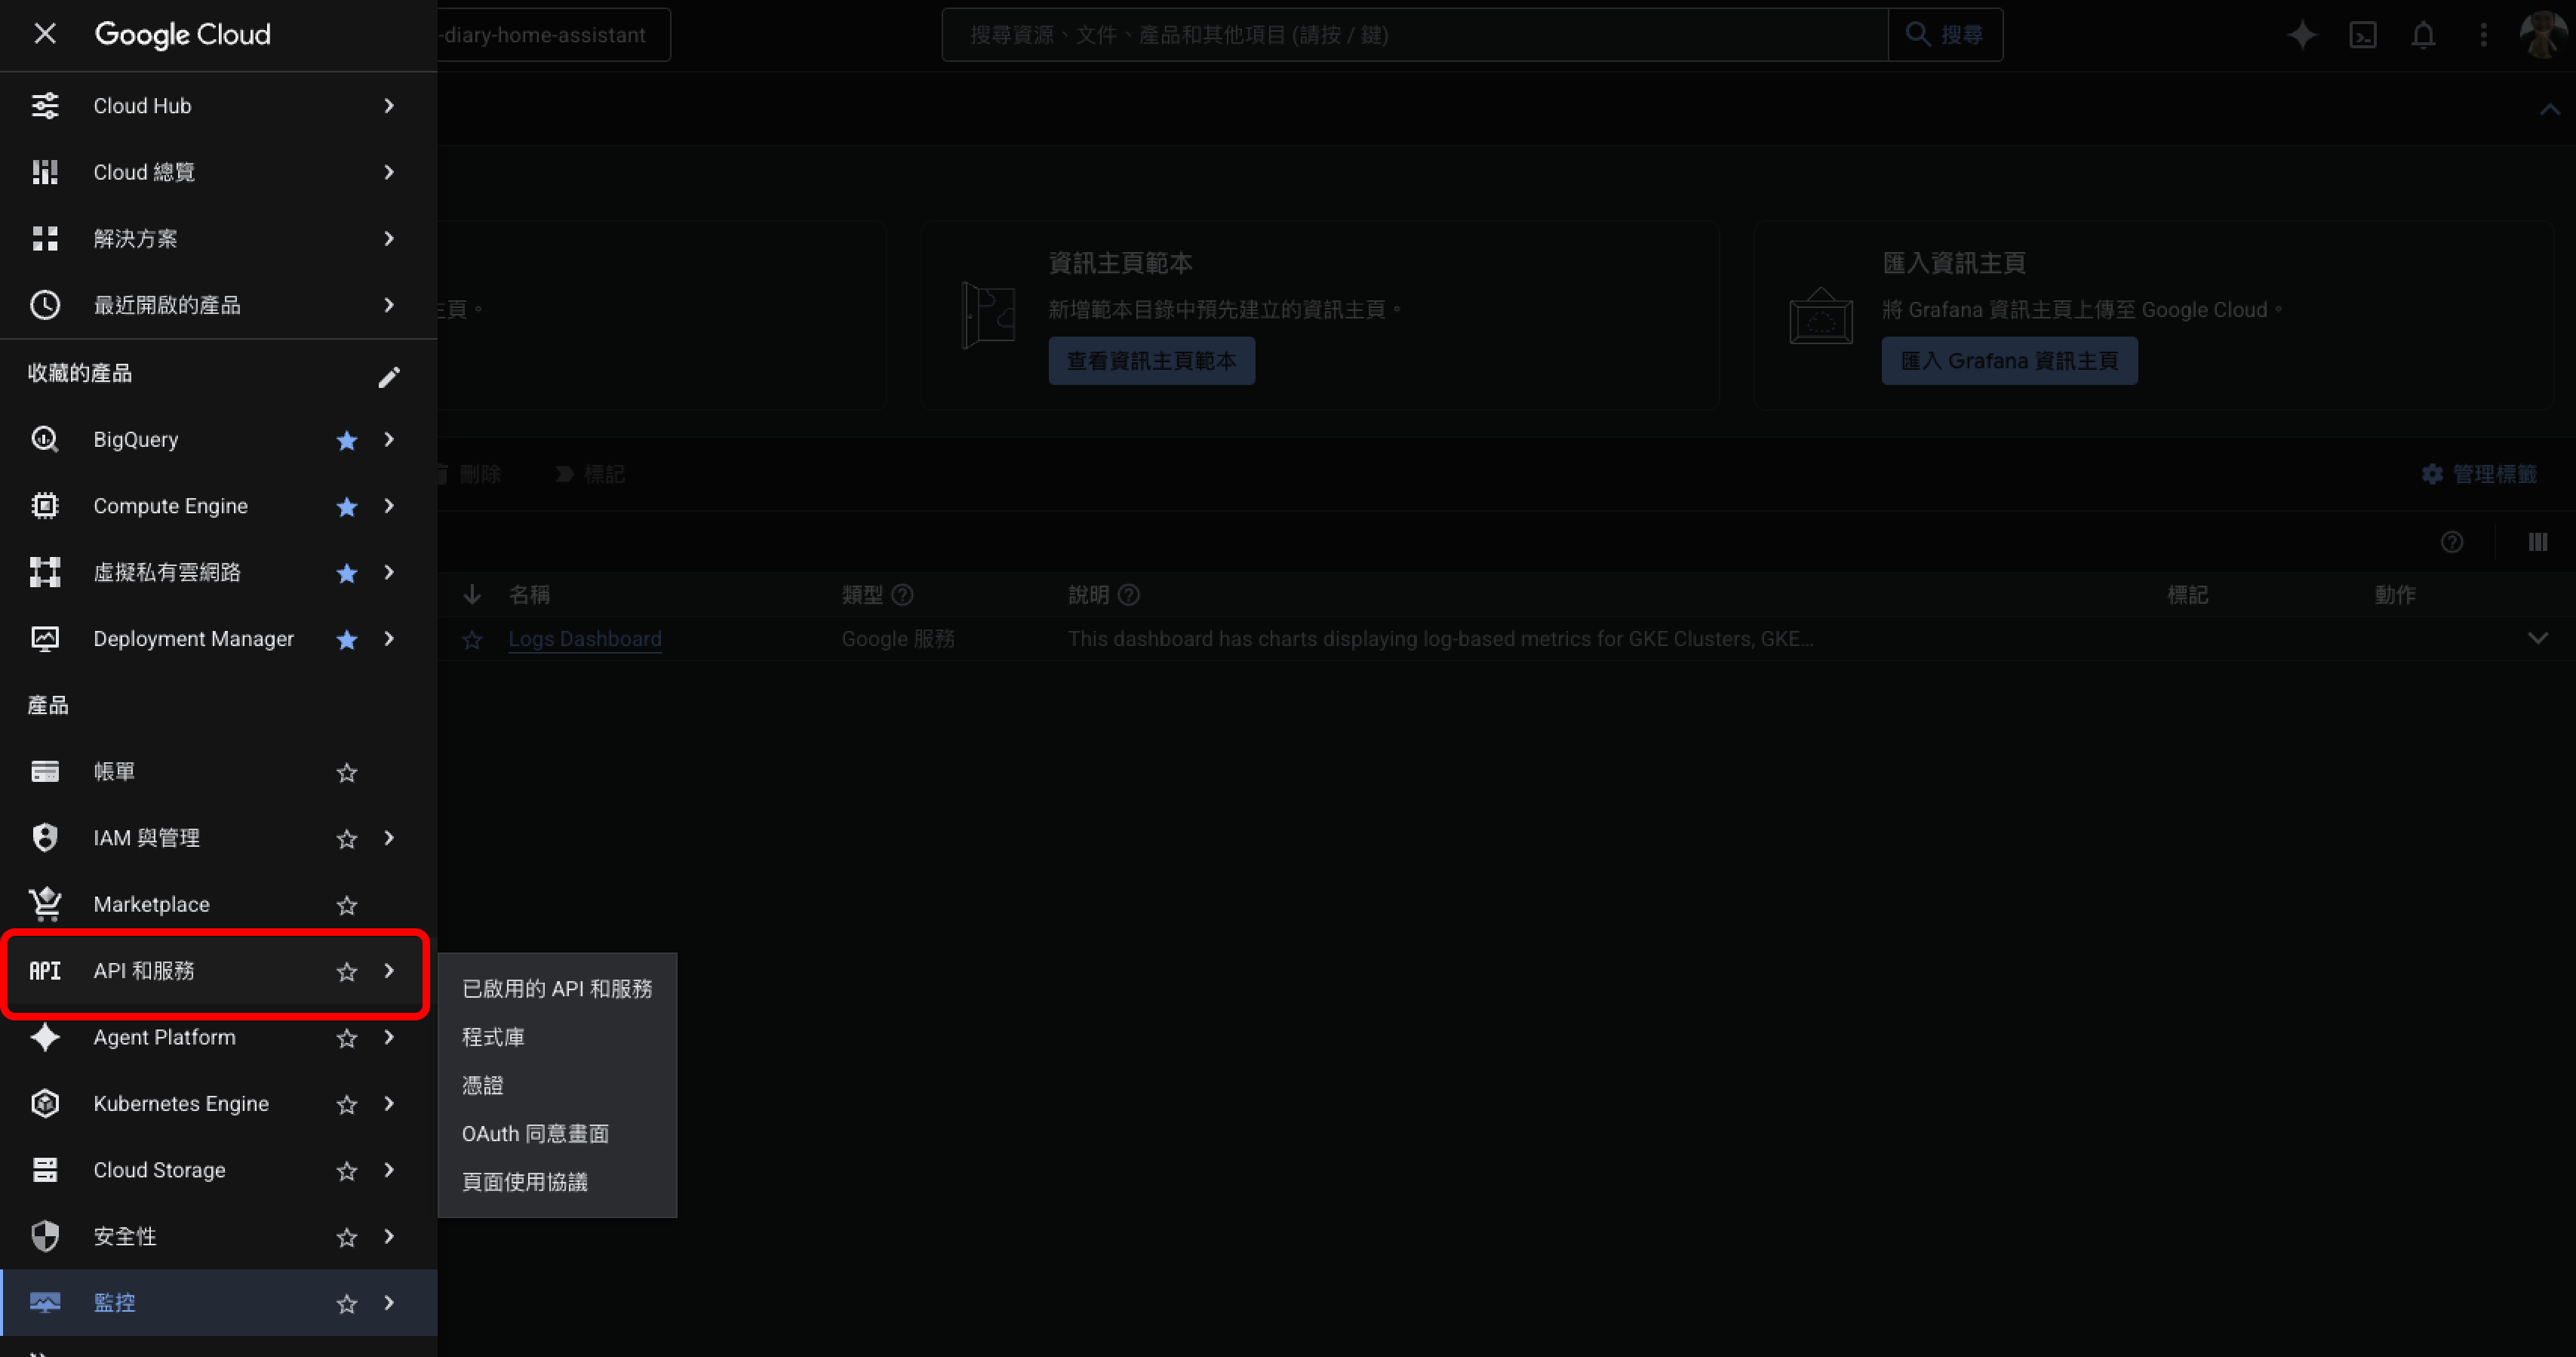
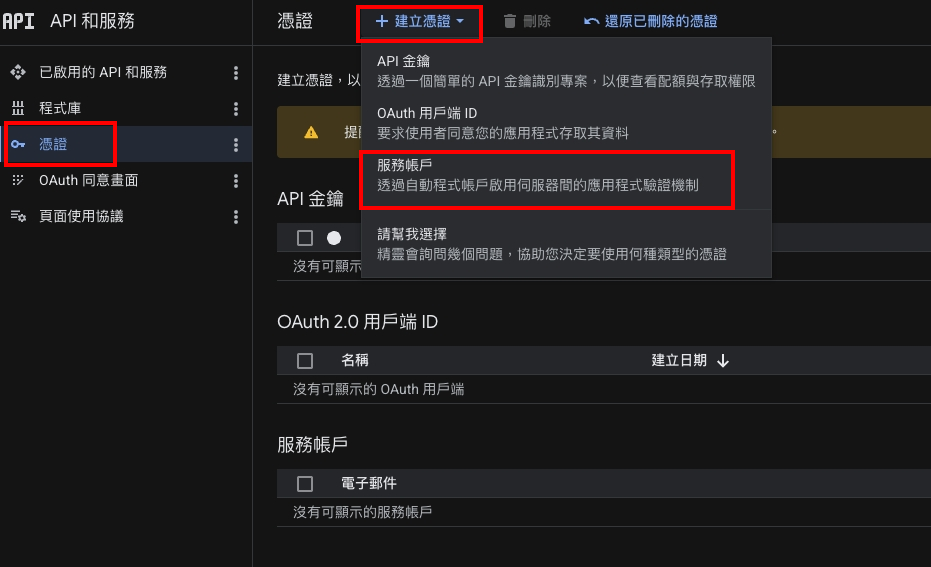
接著在左側選單點擊「憑證」,上方點擊「建立憑證」,接著選「服務帳戶」。
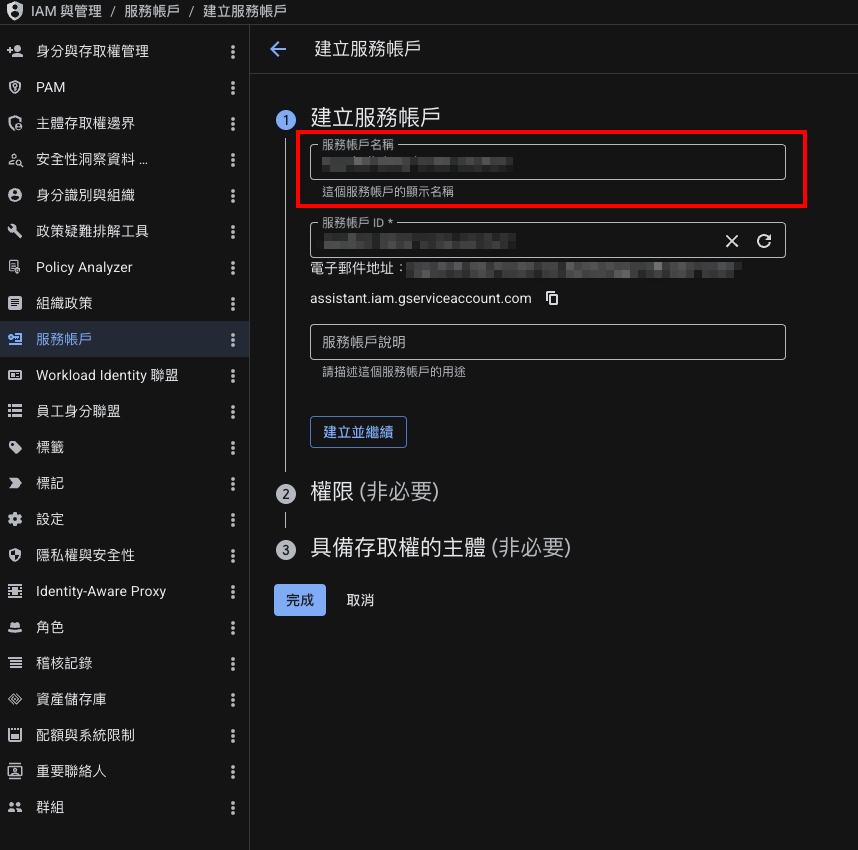
輸入「服務帳戶名稱」,你可以自訂一個喜歡的名稱,輸入完後點擊「建立並繼續」。
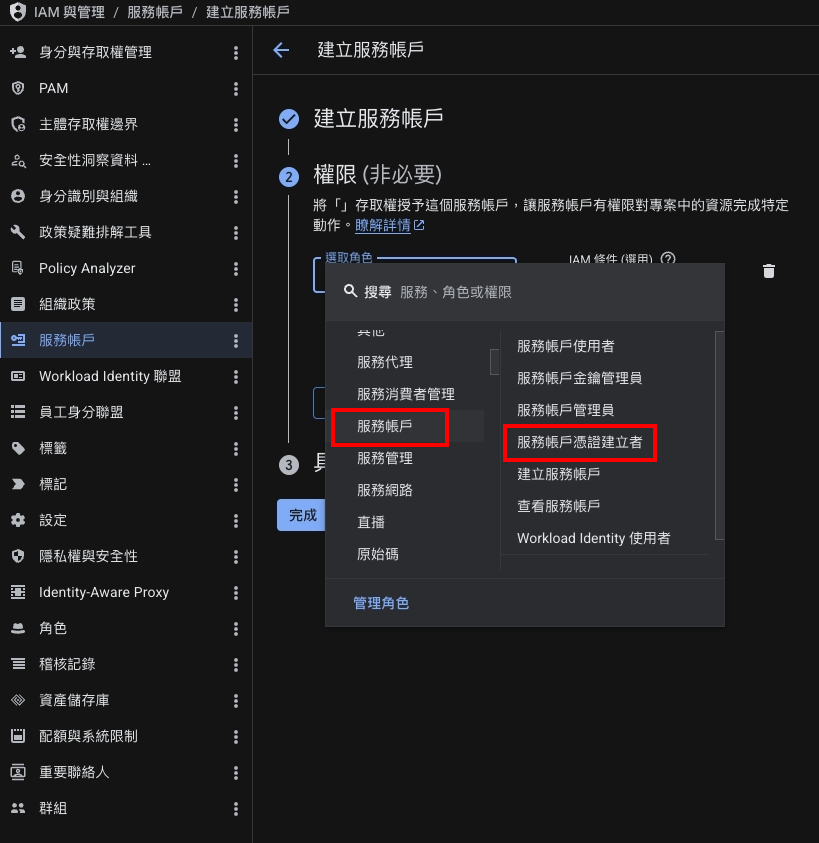
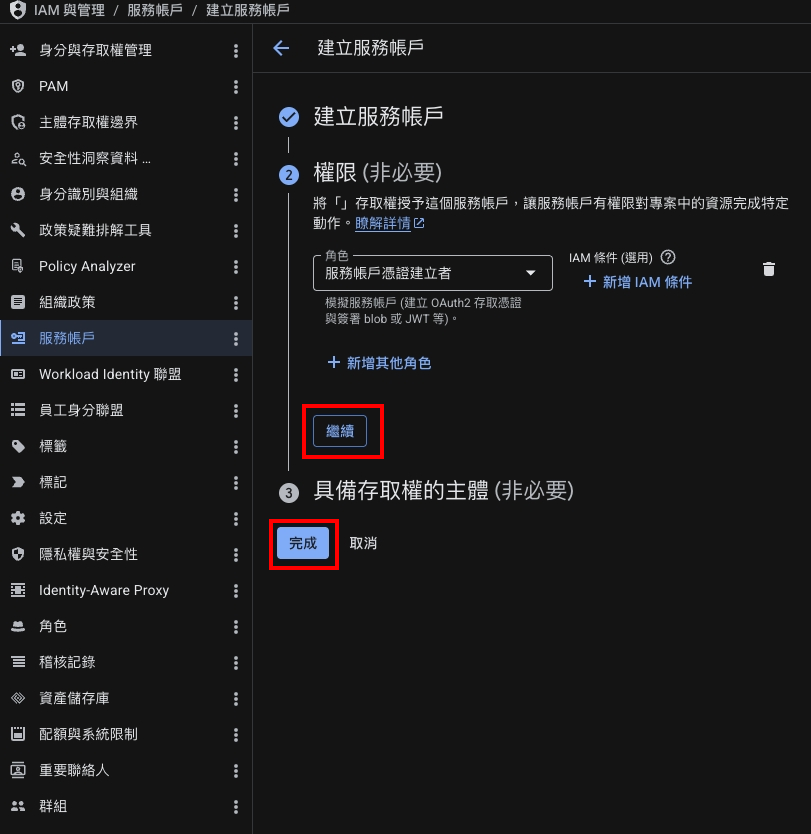
接著在「選取角色」的地方選擇「服務帳戶 > 服務帳戶憑證建立者」。
點擊「繼續」、「完成」。
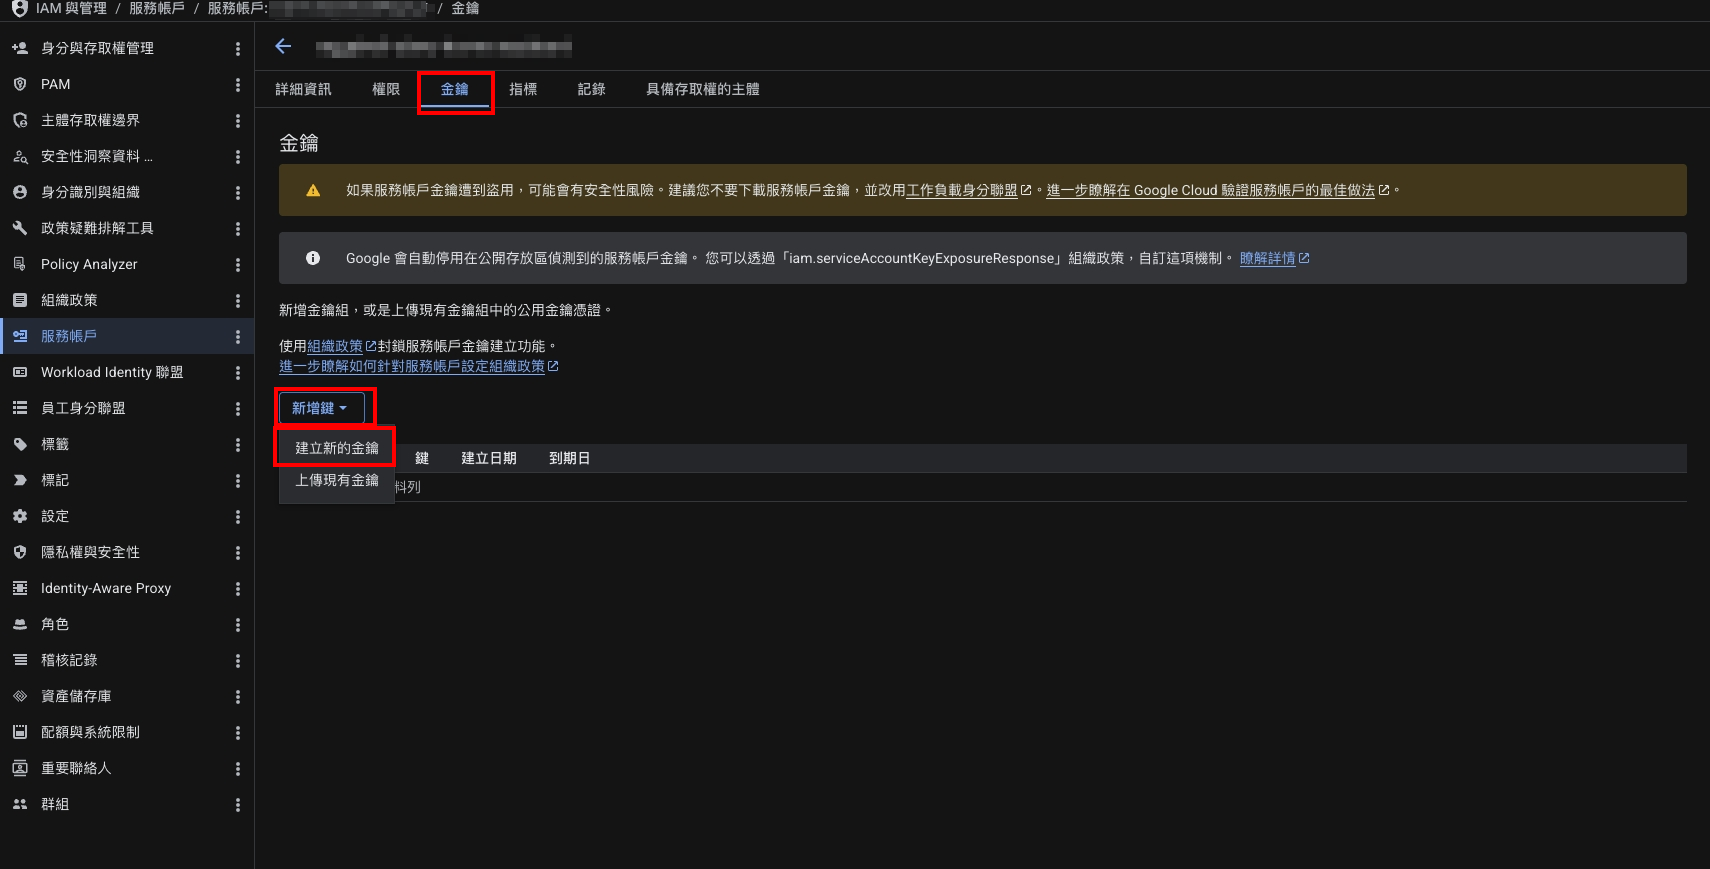
回到憑證列表,找到你剛剛建立的服務帳戶,點擊右側的鉛筆圖示。
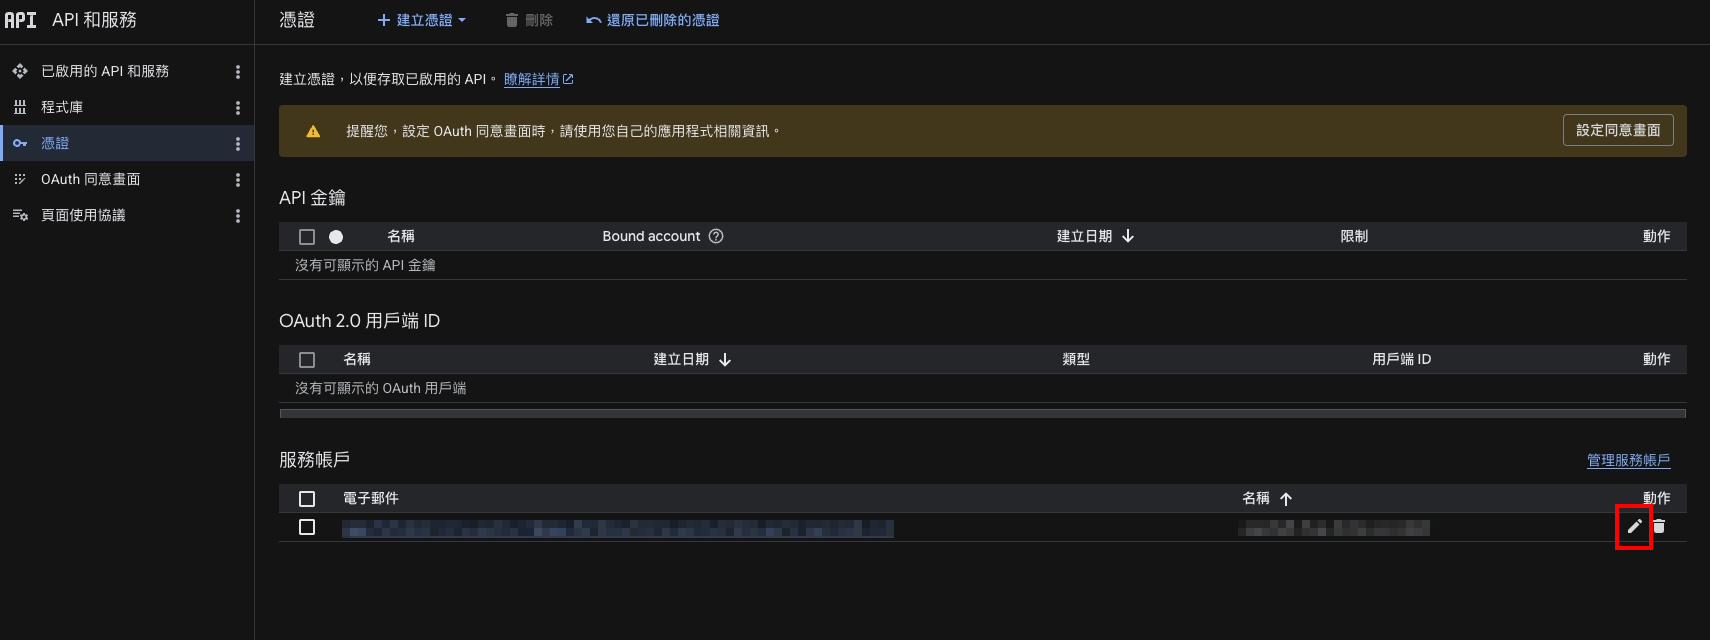
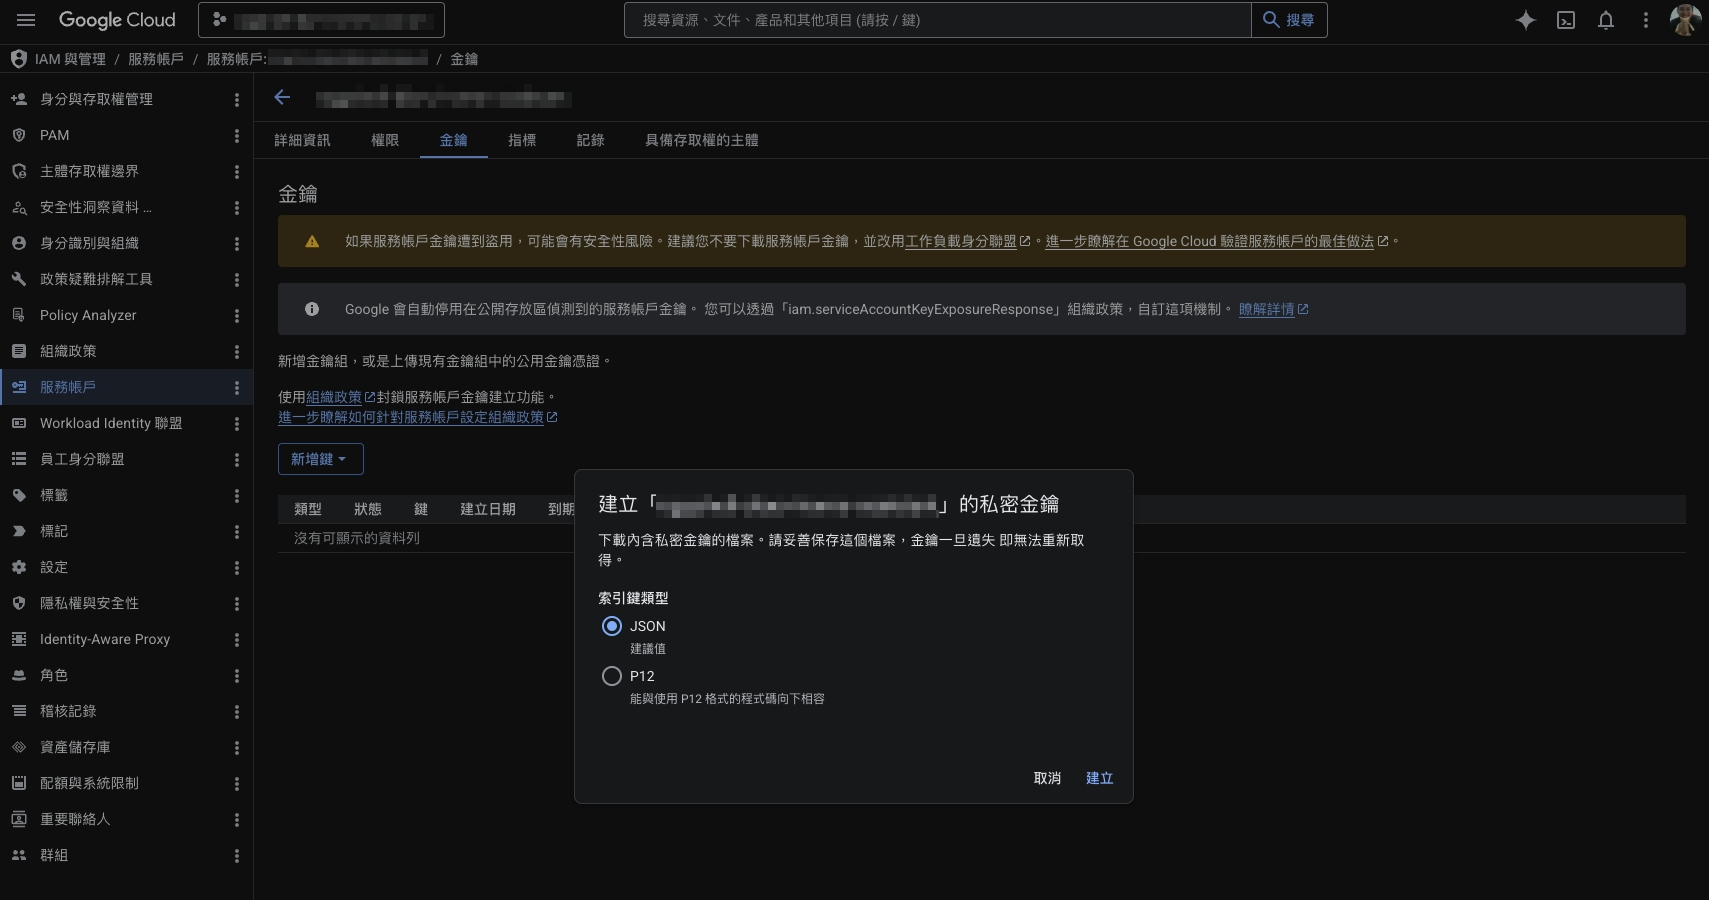
上方分頁切換至「金鑰」,點擊「新增鍵」、「建立新的金鑰」。
選擇「JSON」,點擊「建立」。
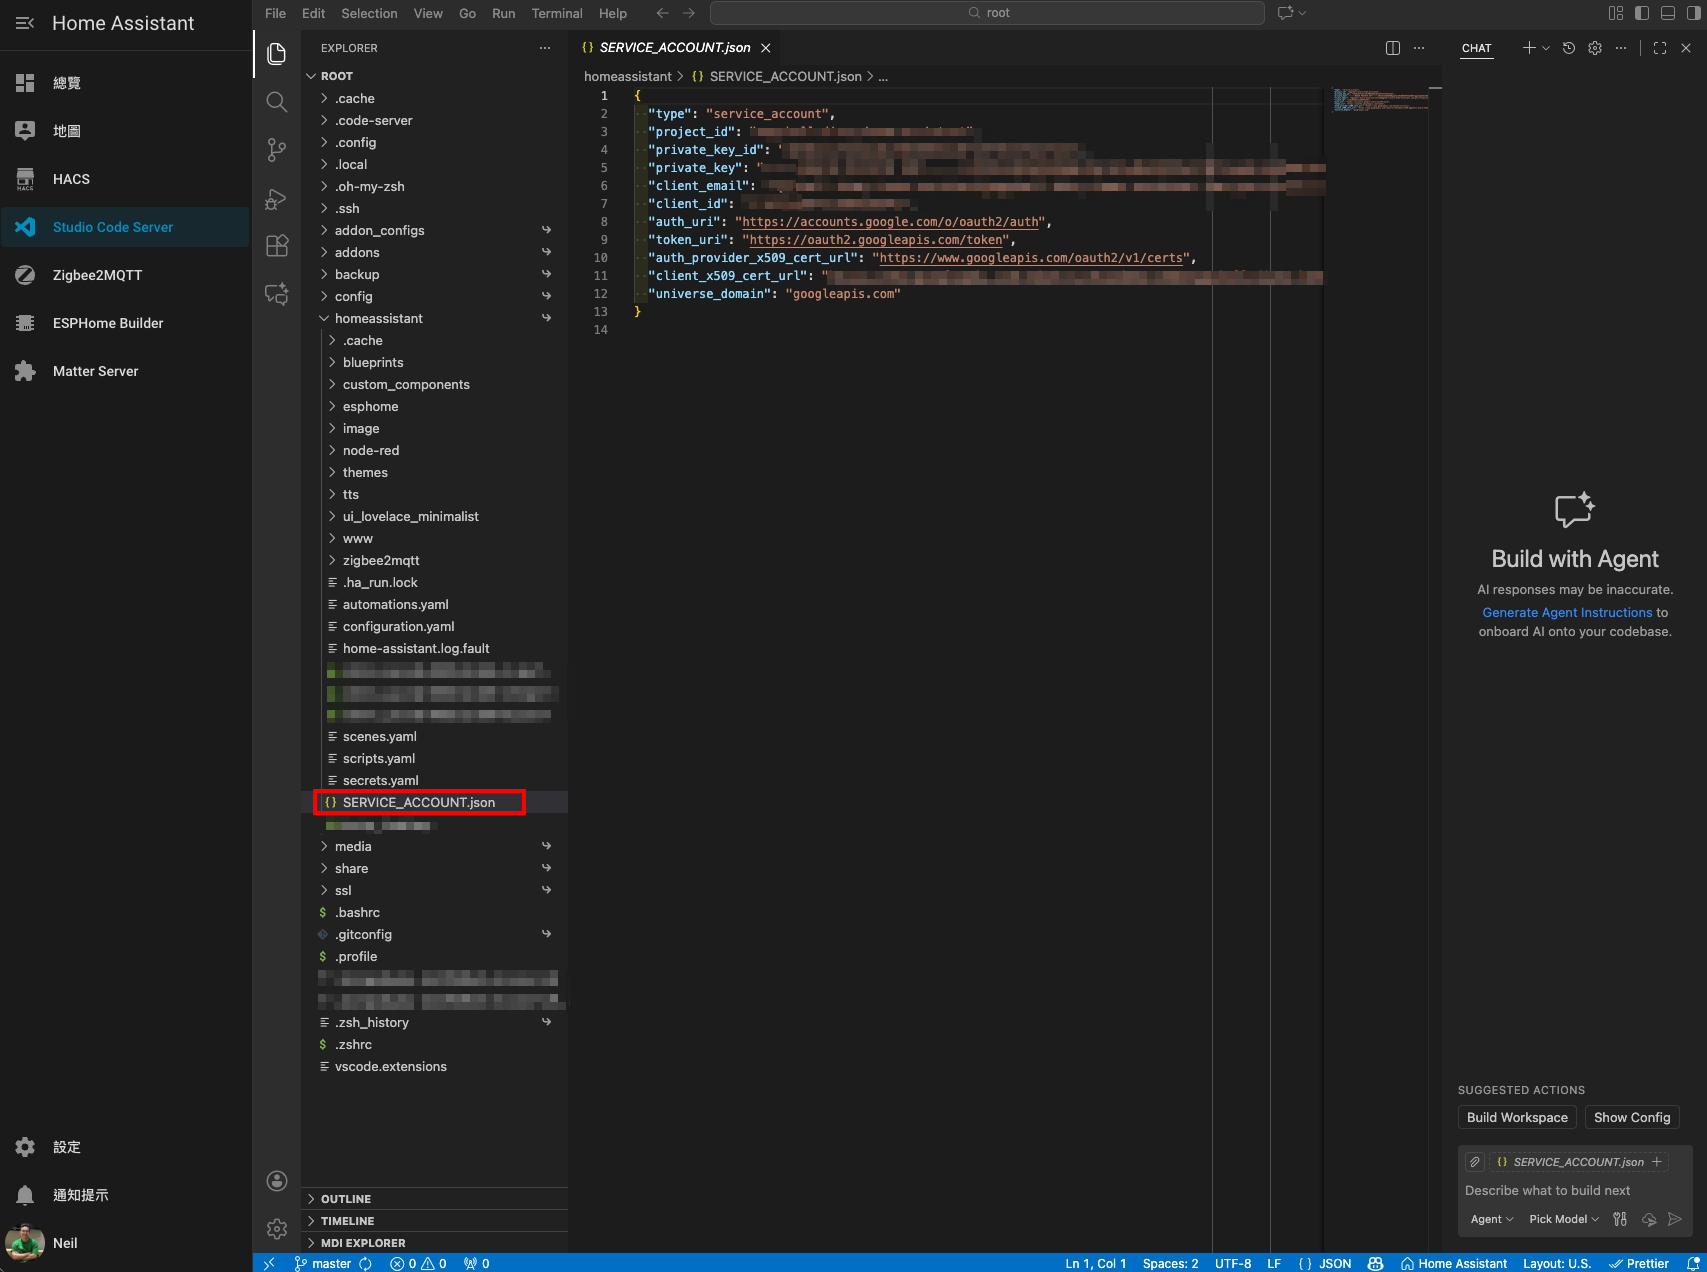
這時候會下載一個 .json 的檔案,把這個檔案改名為 "SERVICE_ACCOUNT.json"

到你的 HA 裡,把下載到的 .json 檔案放到和 configuration.yaml 同一個資料夾裡 (也就是 "homeassistant" 這個資料夾)。
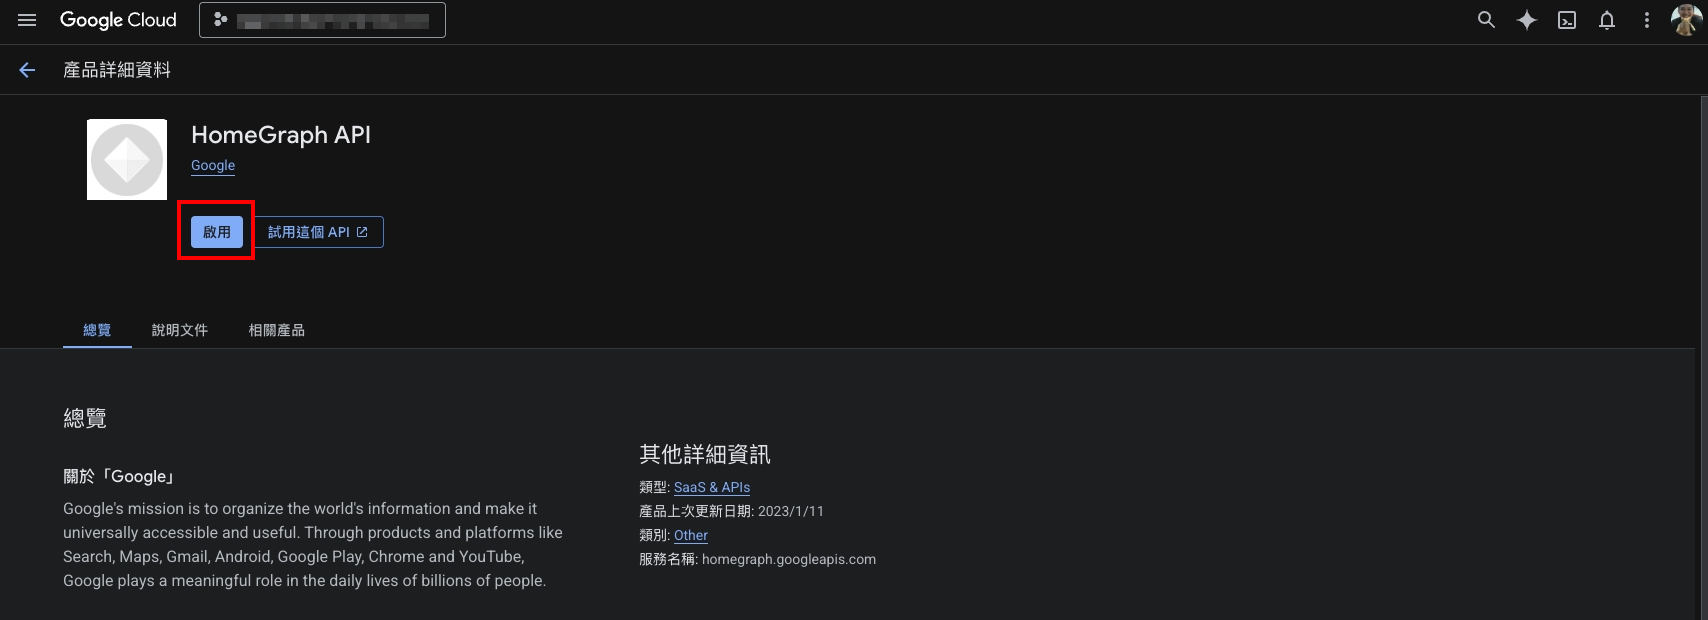
再回到 Google Cloud Platform,在頂部搜尋功能搜尋並點擊 "HomeGraph API"。
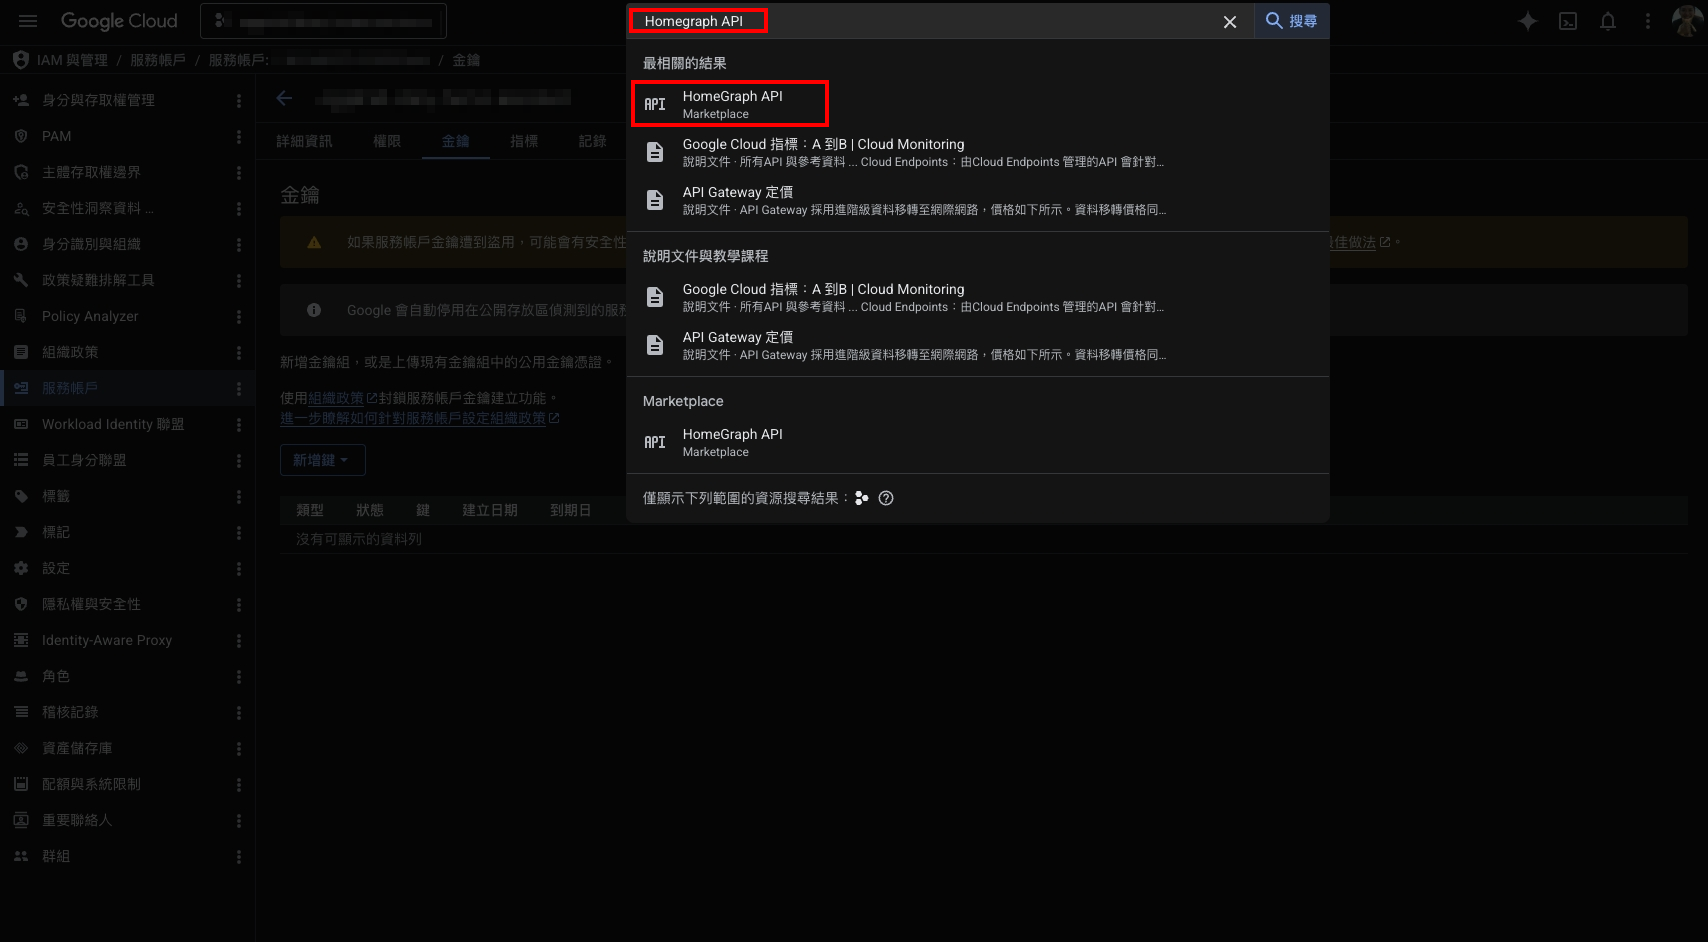
啟用 HomeGraph API。
Step 4. Home Assistant 整合設定
回到 HA,打開 configuration.yaml,加入下面這段 YAML,如果你想要做自訂可以參考 HA 官方說明,記得把下面 YAML 範例中的 project id 換成你自己的。
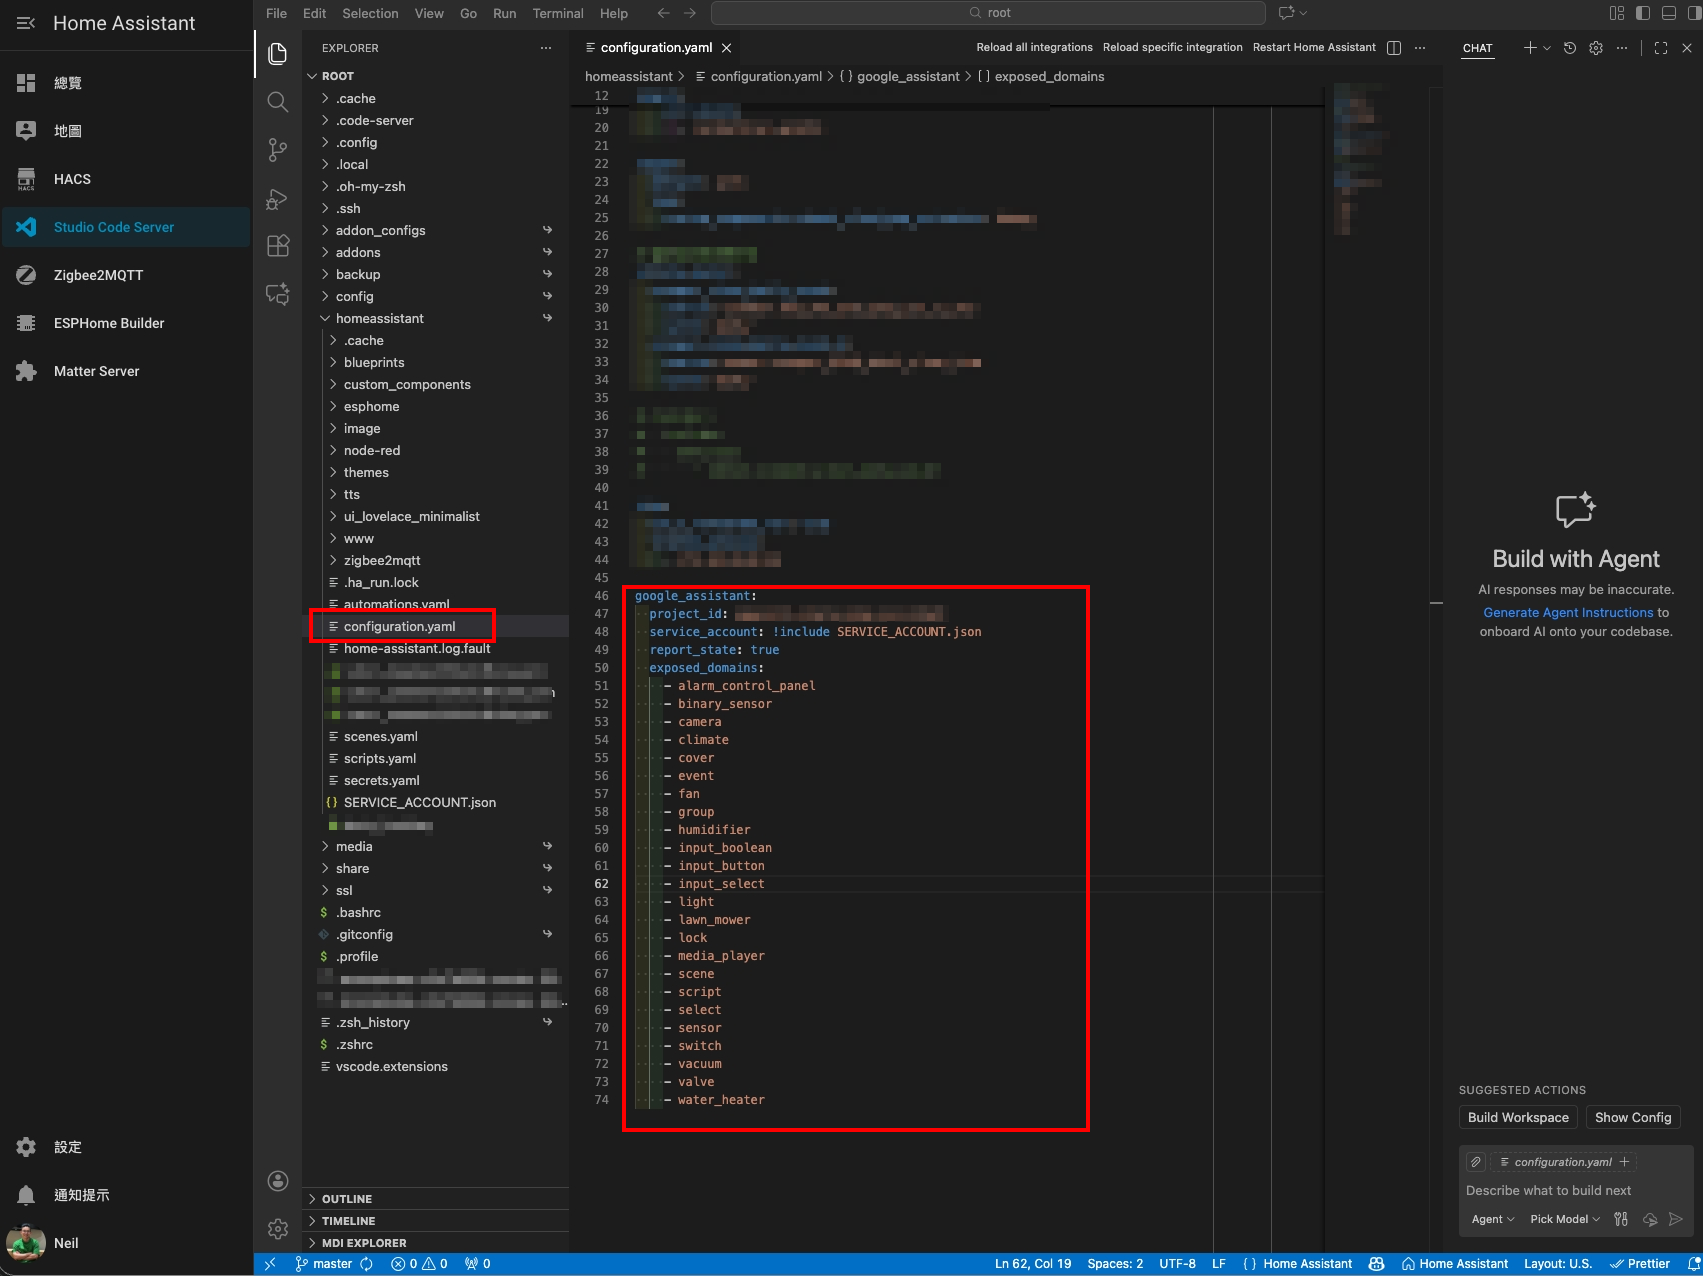
google_assistant:
project_id: [這裡更換成你的 Google Home Developer project ID]
service_account: !include SERVICE_ACCOUNT.json
report_state: true
exposed_domains:
- alarm_control_panel
- binary_sensor
- camera
- climate
- cover
- event
- fan
- group
- humidifier
- input_boolean
- input_button
- input_select
- light
- lawn_mower
- lock
- media_player
- scene
- script
- select
- sensor
- switch
- vacuum
- valve
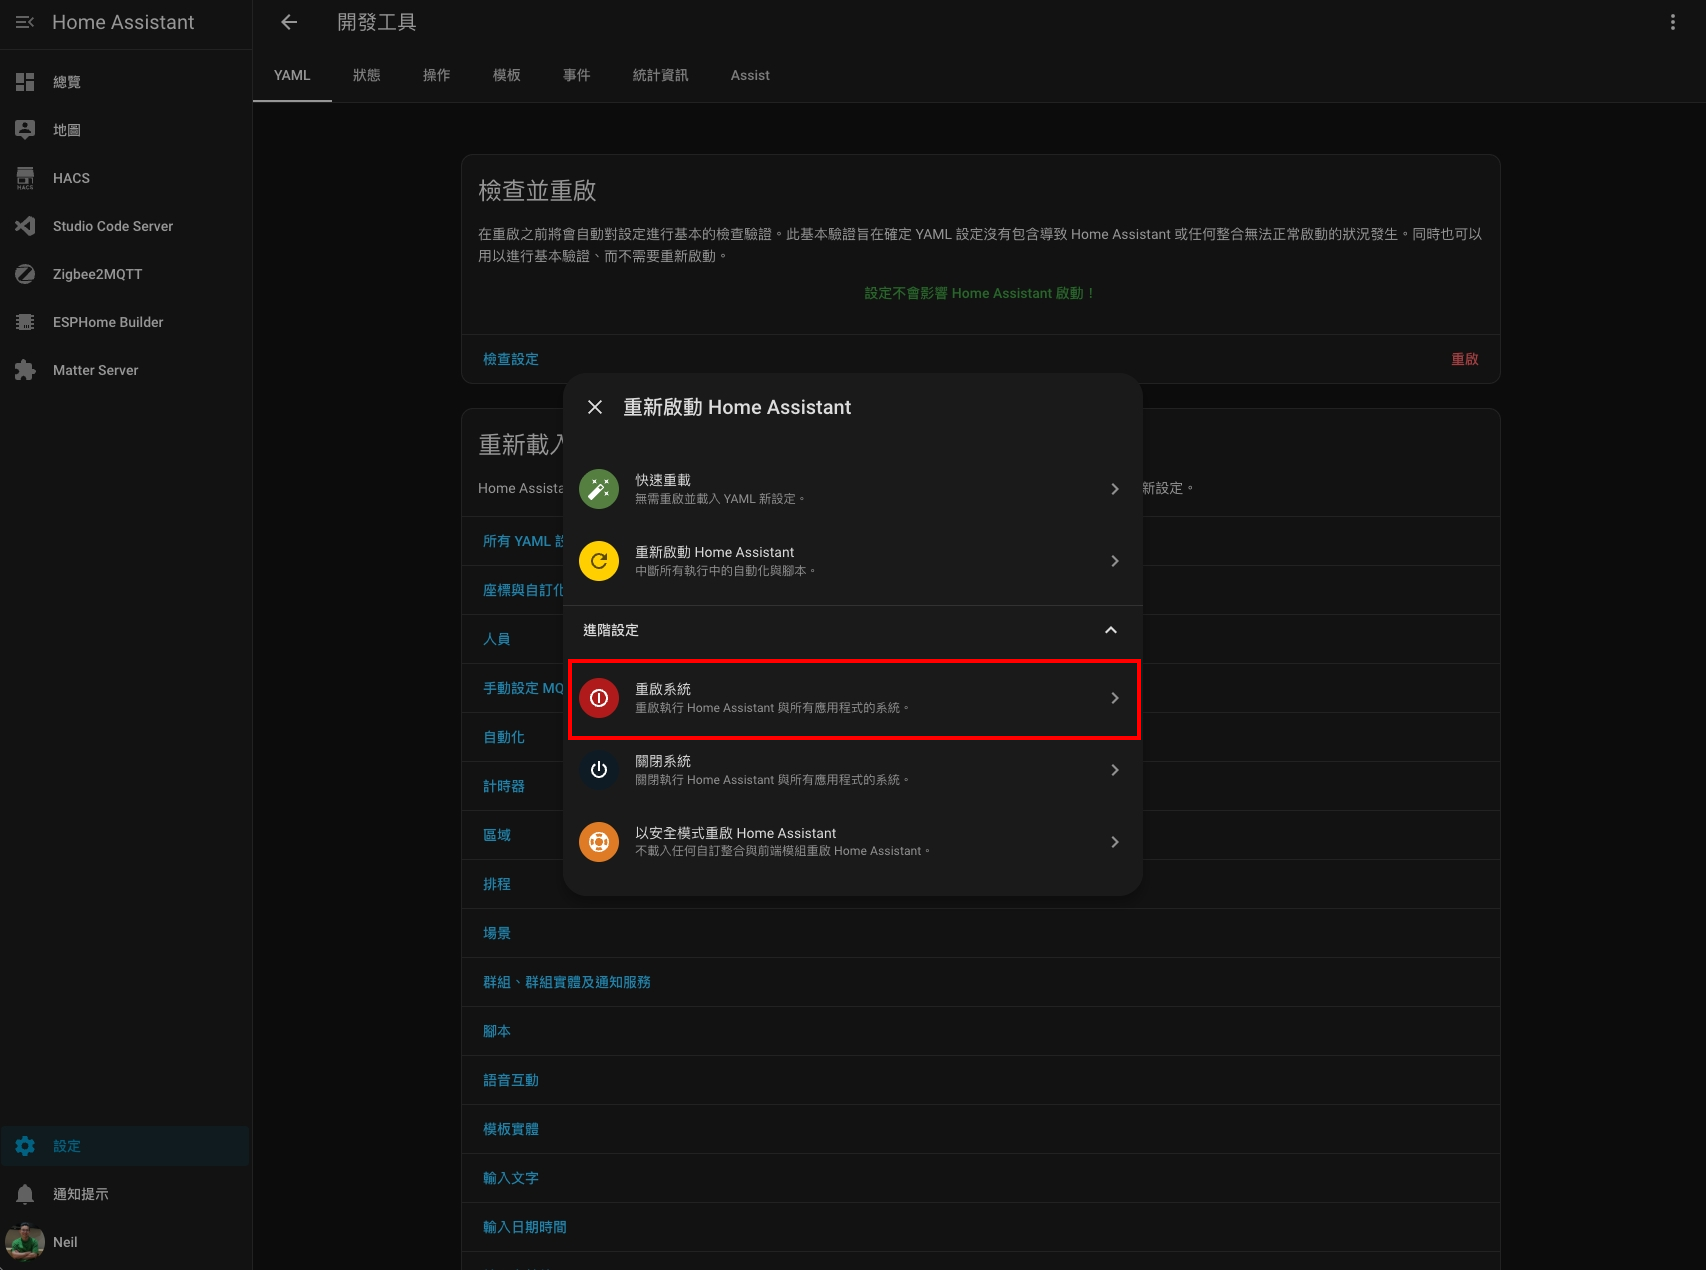
- water_heaterconfiguration.yaml 編輯完成後,來到「設定 > 開發工具 > 重啟」選擇「重啟系統」,讓剛剛變更的 configuration 生效。
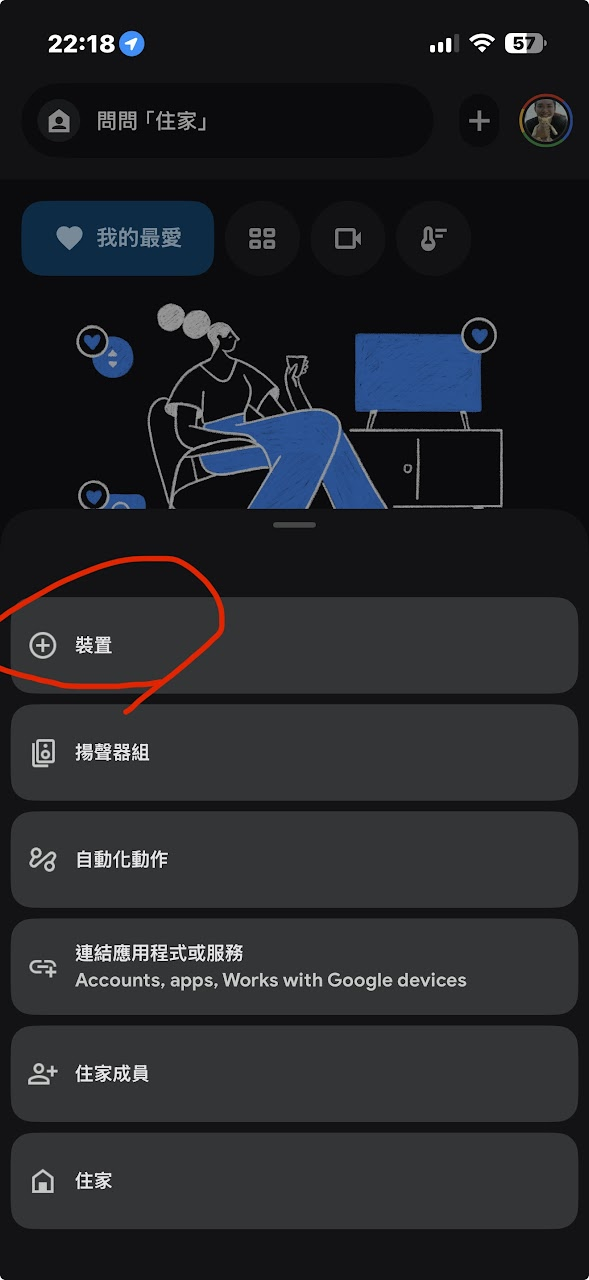
Step 5. Google Home 加入整合
Home Assistant 重啟完成之後,打開你的 Google Home APP,右上角點擊「+」,接著選擇「+裝置」。
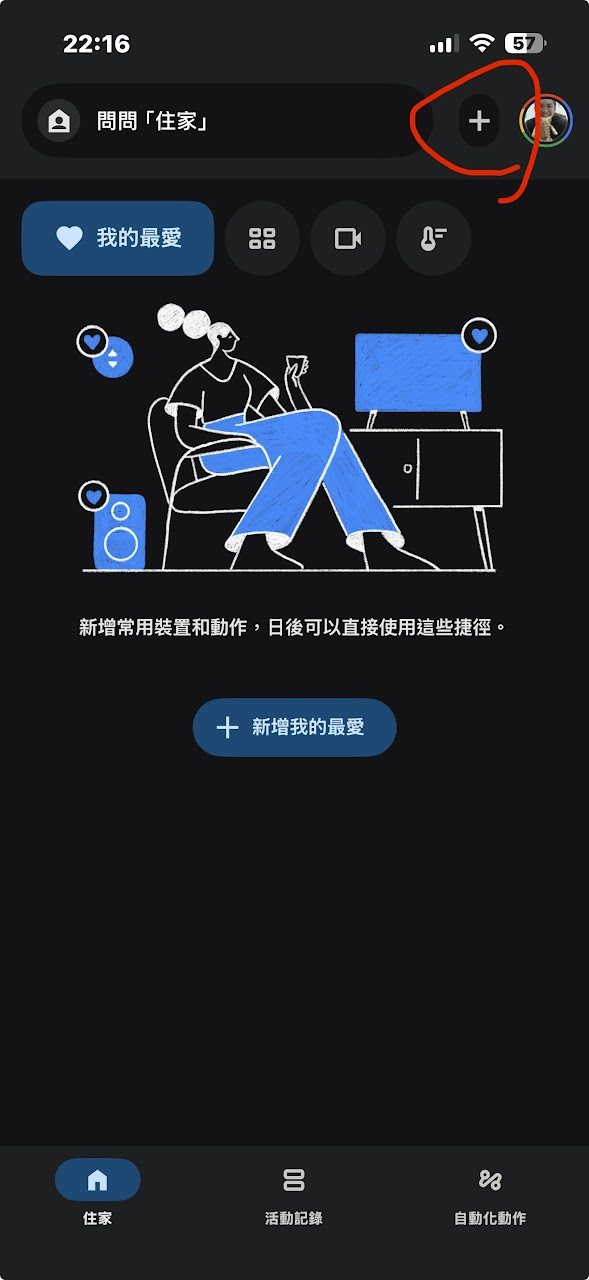
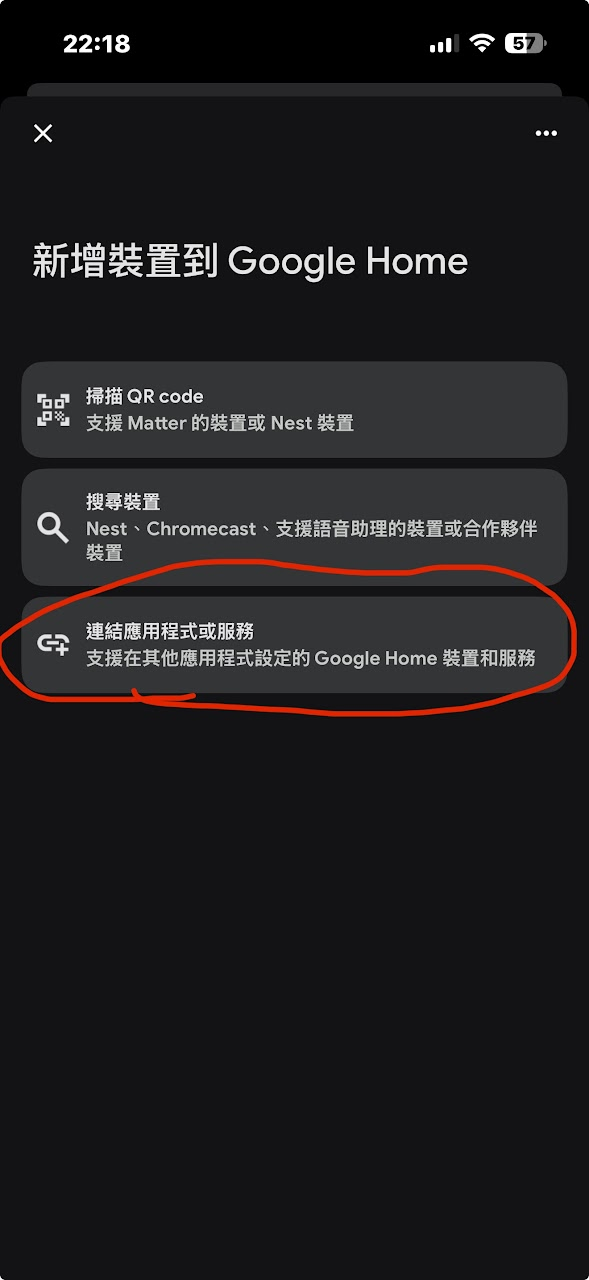
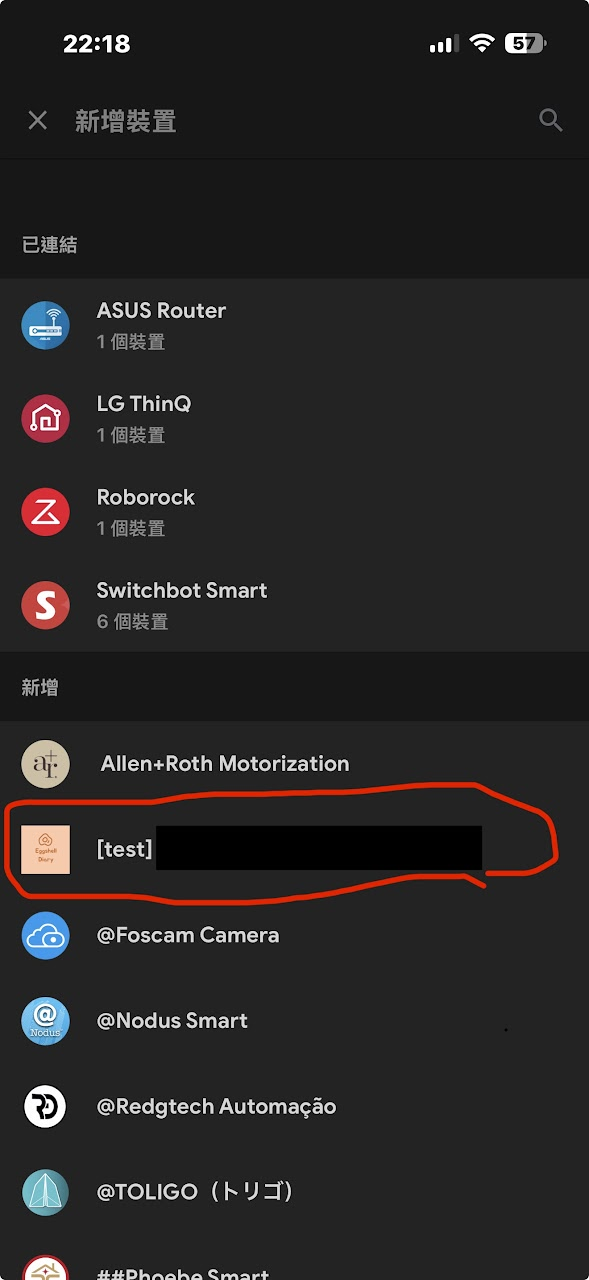
點選「連結應用程式或服務」,接著在清單中找到掛著 [test] 前綴的你的 Google Home Developer project。
點擊「繼續」、「同意並繼續」。
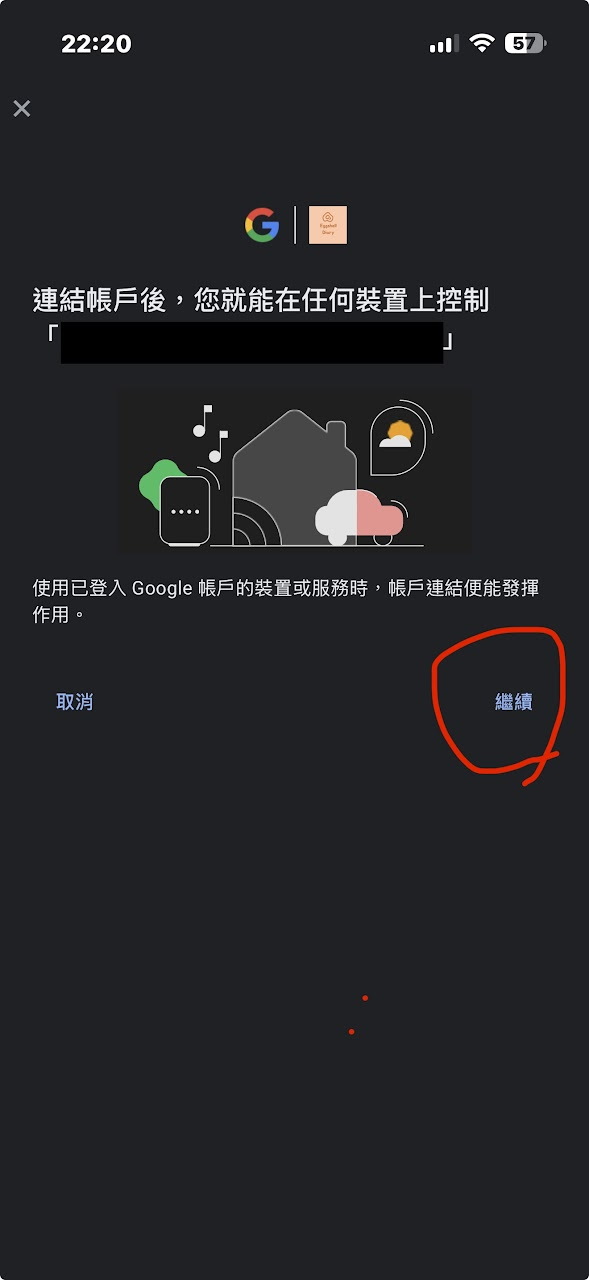

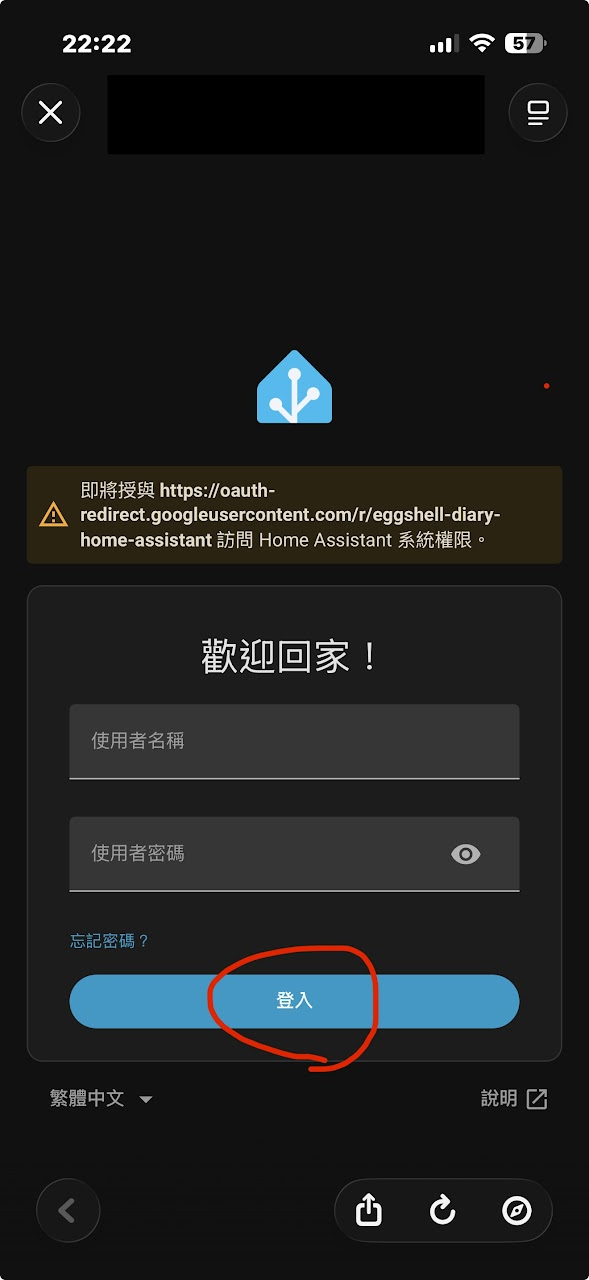
接著登入你的 Home Assistant 帳號就完成啦!


Discussion